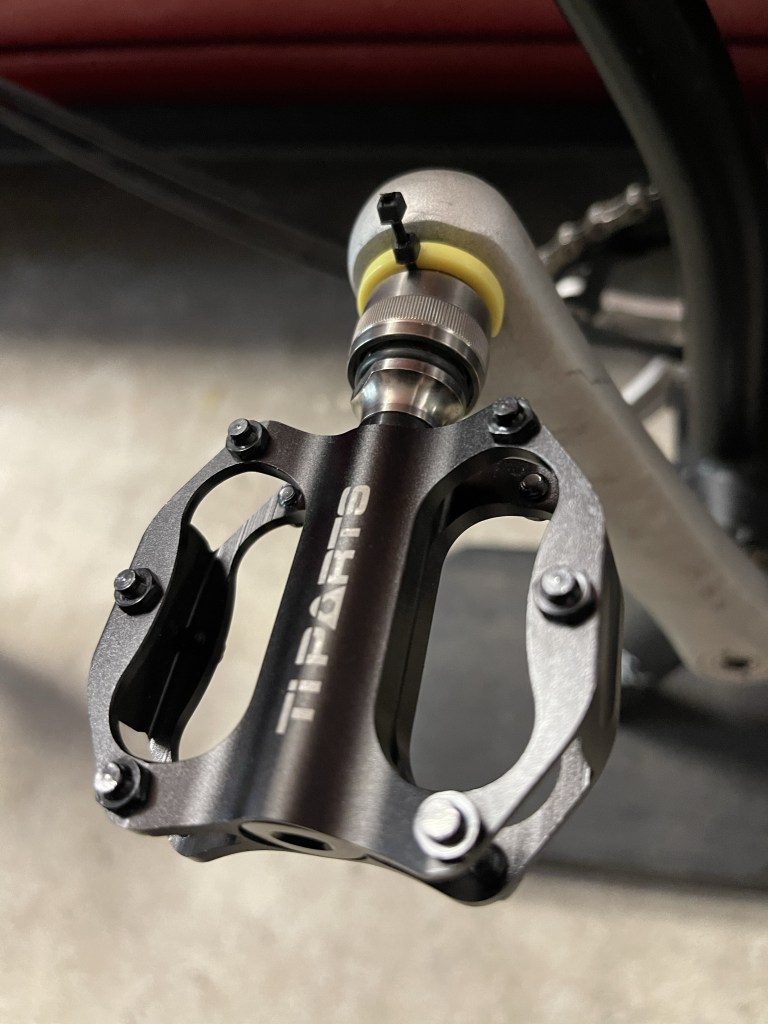
Some QR pedals seem more prone to self-releasing than others – possibly due to the pedal platform shape? While my lightweight Aceoffix pedals have never budged, a TiParts Mini-Q pedal surprised me recently by falling off while I was stepping off. Did I fail to snap it on properly or did I nudge the release mech while pedaling?
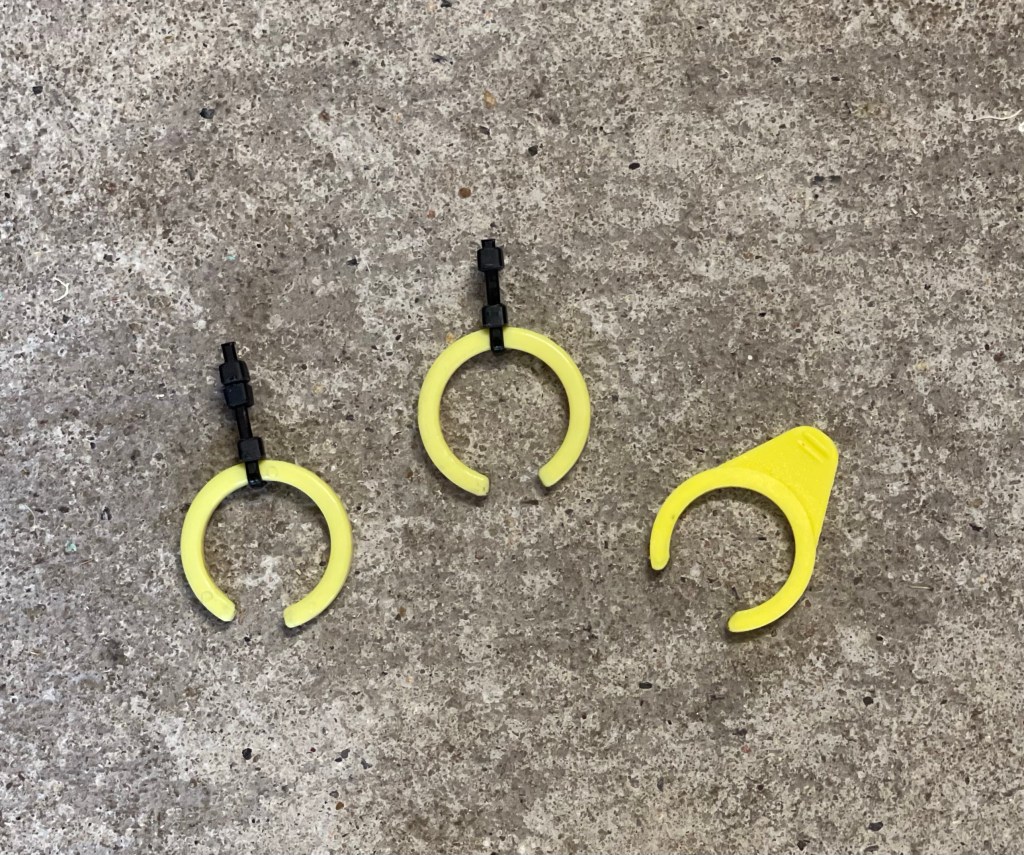
Time to start using the yellow nylon retainer clip, even if my old style retainers are fiddly to remove? With newer retainers having a small protusion/handle, maybe I could match them?
Voila! A small cable tie around the clip (& the head of another tie as a grip handle) seems very workable?
However, tinkering is essential so I ordered a new types clip pack of 10, in case my modded clips proved fragile or ineffective. A comparison showed the new type to be made of a stiffer nylon, harder to insert (unless you aligned them with the “spanner flat” on the adapter) & quite hard to remove. No doubt some practice may help to develop “the knack” but for now my “hack” of the old type clip is great. I even tried doubling up the cable tie “heads” but the grip handle feel is similar.
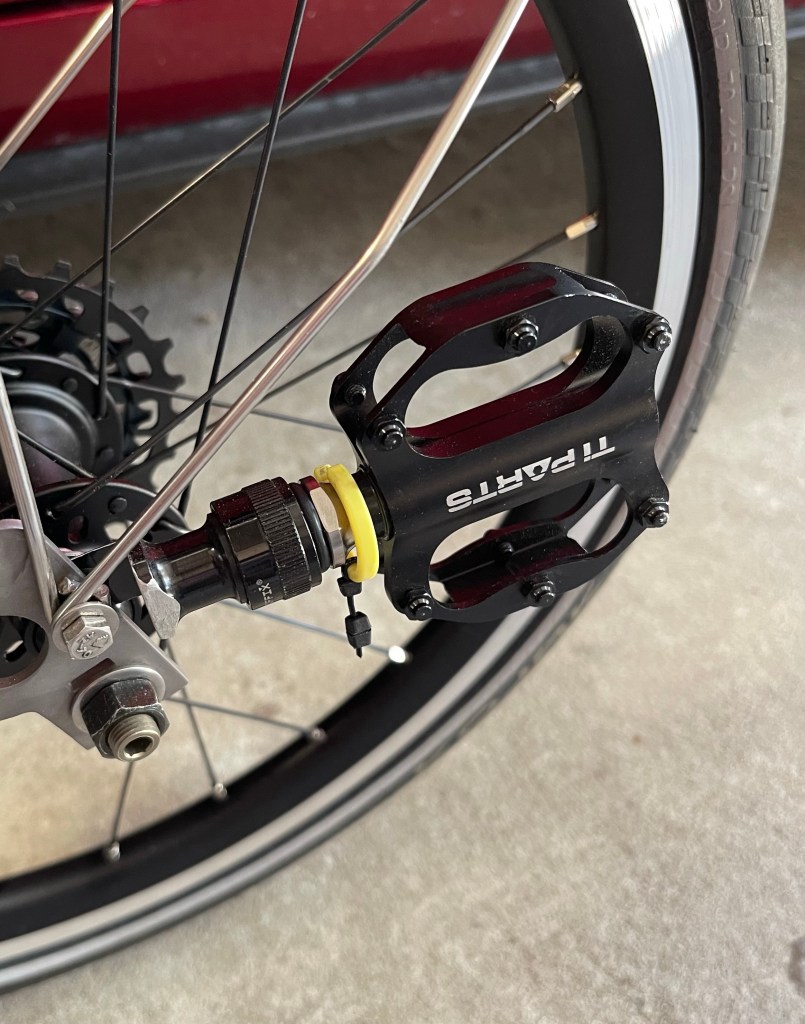
As for storage of the clip when the pedal is removed, there a few options: insert the clip back on the QR adapter, slip it on the rear frame lower tube or on the pedal storage adapter (if you use one) – eg on the adapter stub near the lock ring or on the axle of the pedal?
Time provides new ideas. The current status here is three 5speed Brommies but from different starts.
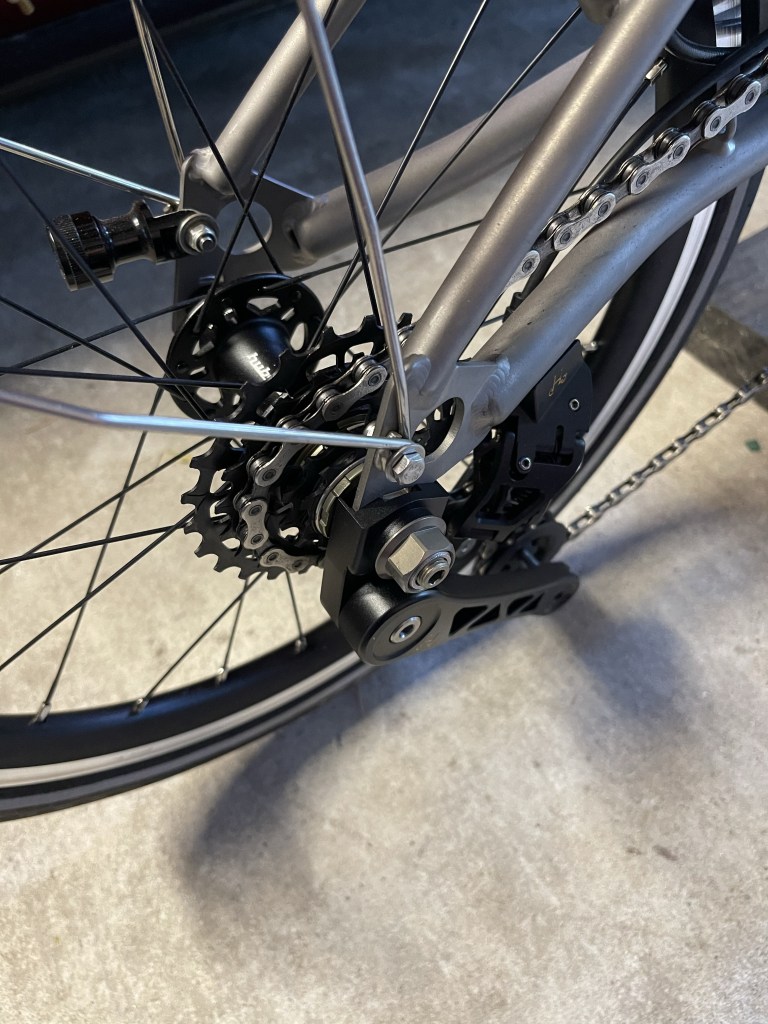
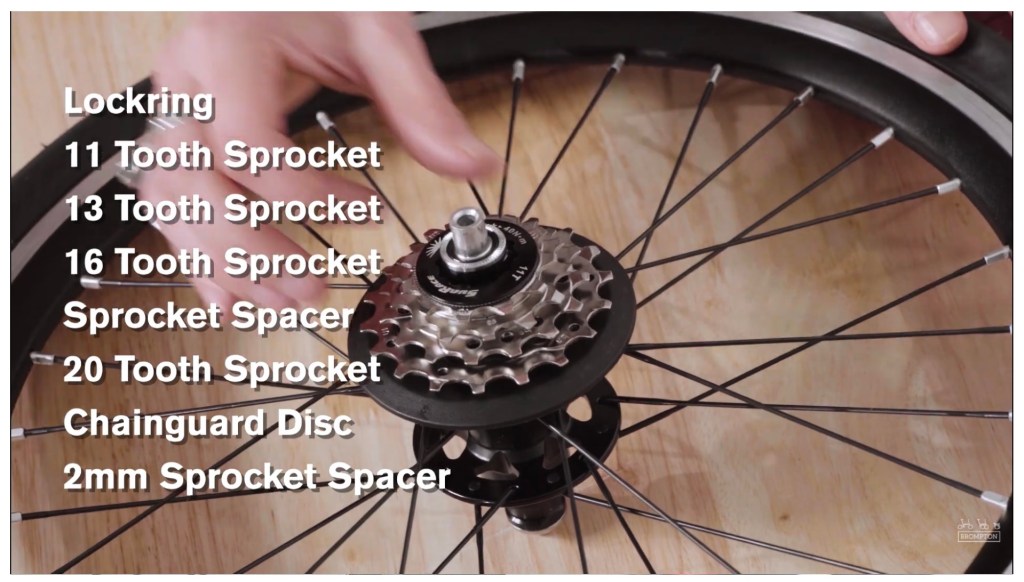
BromTi has a Silverock 7speed wheel, running 5 cogs (11/13/16/20/24T) with varying spacers to match a Shimano XT shifter. (Works well; couldn’t get consistency with the XT with 6 or 7 cogs – & the chainline with 5 cogs isn’t so extreme?) Now with a Kinlin XR 18C wheel rim fitted (wheel initially came via eBay with Kinlin NBR 13C) & good spokes & nipples.
BB has a BrommiePlus custom build lightweight Hubsmith 2/3speed hub & fitted with a 5speed MiniMods UniBody cassette (11/13/17/21/25T).
Clarence has a Brompton 2speed wheel & a BrommiePlus 5speed freehub & fitted with a 3speed MiniMods UniBody cassette (11/14/17T) & additional cogs (21/26T).
The shifters for Clarence & BB are Sram GX 11speed.
I think the accurate machining of the UniBody cassettes is better for shifting than using separate Shimano 11/13T shouldered cogs (with seeming spacing inconsistencies?).
BromTi has a Thx4Ride parallelogram derailleur while the other two use similar H&H units.
So, there they are; all setup at different times with what seemed ideal (& available) then. At present, BB gets the favourite vote for simplicity & lightness – although for effectiveness, it’s a 3-way tie.
Lightish wheels with good gearing range & minimal hub drag.
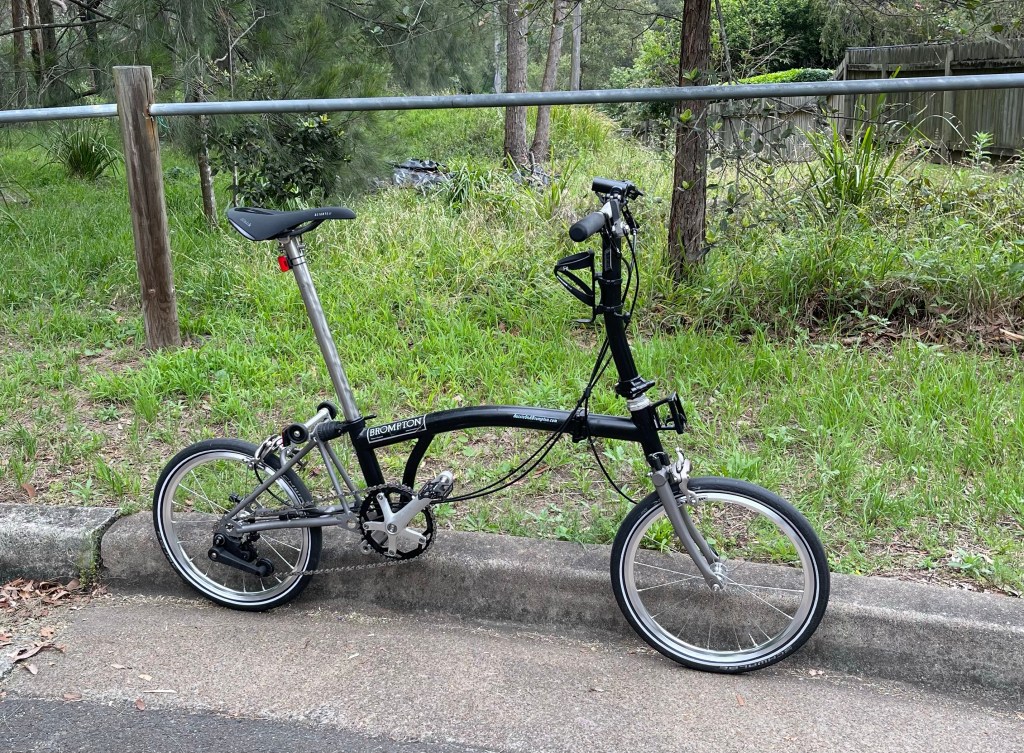
With all the mods & tweaks to BB (my S6L-X super lightweight black Brompton), I realized that the only component original & unmodified was now the steel mainframe! Also, that meant my parts bin contained almost enough to build a complete Brompton – what I needed was an extra mainframe! Time to try a Ti mainframe? – & to resurrect Ralph for resale? (Ralph being my original S11E Alfine 11spd device that I’d decided really didn’t suit my current medical state & became the basis for the rebuild into the 8kg 6spd BB.)
So, an order was made for a Ti mainframe (from Ti39) & it was a simple & quick job to transfer everything onto the new frame. A glossy black 2mm tube affair, it seemed an impressive piece of art? Onto the scales & the complete Brompton weight is 7.4kg. As for a name, I thought it time to retire BB & go for BromTi (after all, some would say it’s not a “real Brompton” anymore?).
Once I’d stripped the steel mainframe for Ralph, the rebuild commenced; a slower affair, as every single component had to be installed (unlike the many whole assemblies transferred to the new frame). As I didn’t expect to be using Ralph, I decided to stick with an all-steel setup & with a Brooks saddle, Ergon grips, Marathon tyres & a new set of mudguards. All up, Ralph now weighs 13.1kg.
PS: An unexpected outcome has been the claiming of Ralph by Mrs Aussie – sheesh! another Brompton around the place!?
Some recent changes to my side of the Brompton fleet so here’s the status…
All are now running “minimal rain-guards” (yes, Sydney has been rather wet – for far too long).
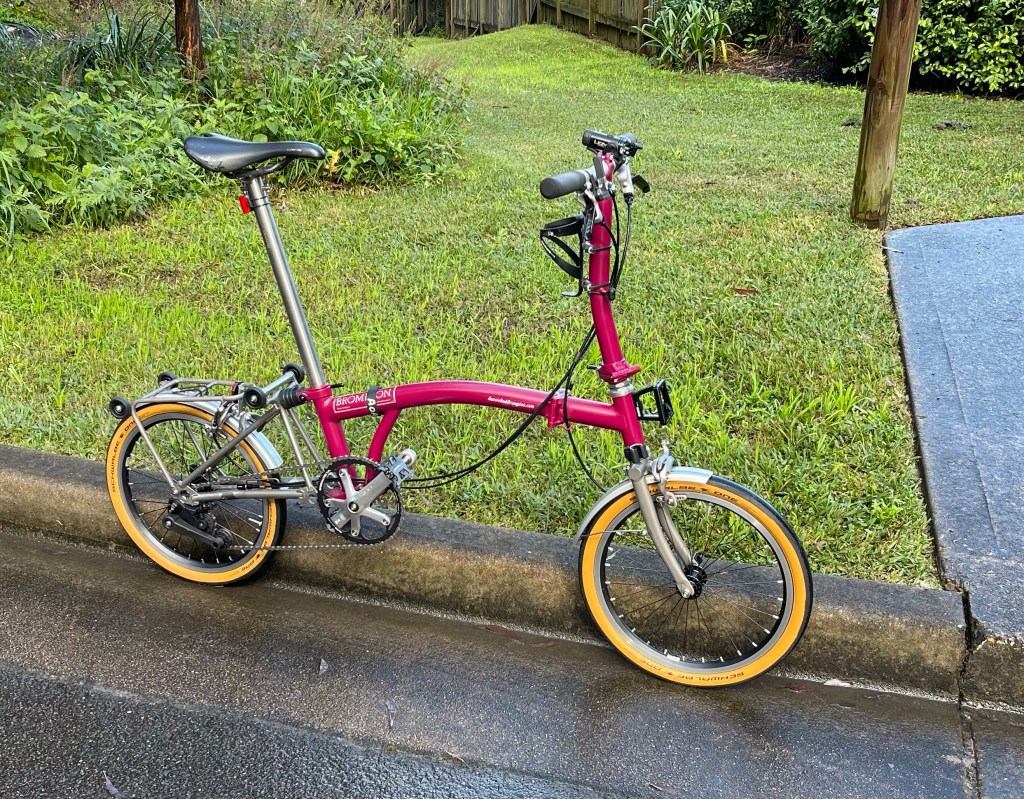
Rudolph (10.6kg)
Chpt3 S9R-X with 38T chainring & 13/15/18T cogs (GIs 76-22)
After lowering Rudolph’s 6speed cog setup to the lowest feasible (15/18T, GIs 66-22), installing a 3speed shift conversion has given/restored some upper range flexibility (you never know when a tailwind will come along).
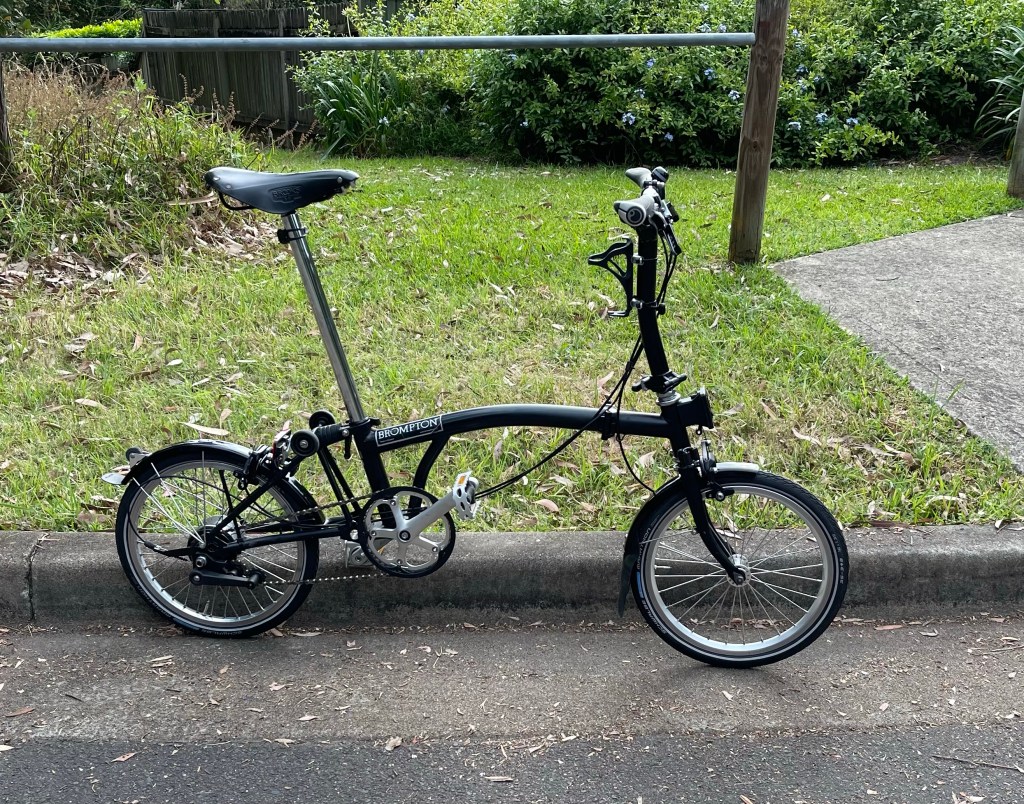
Clarence (9.15kg)
S4R-X with 46T chainring & 11/13/16/20T cogs (GIs 69-38)
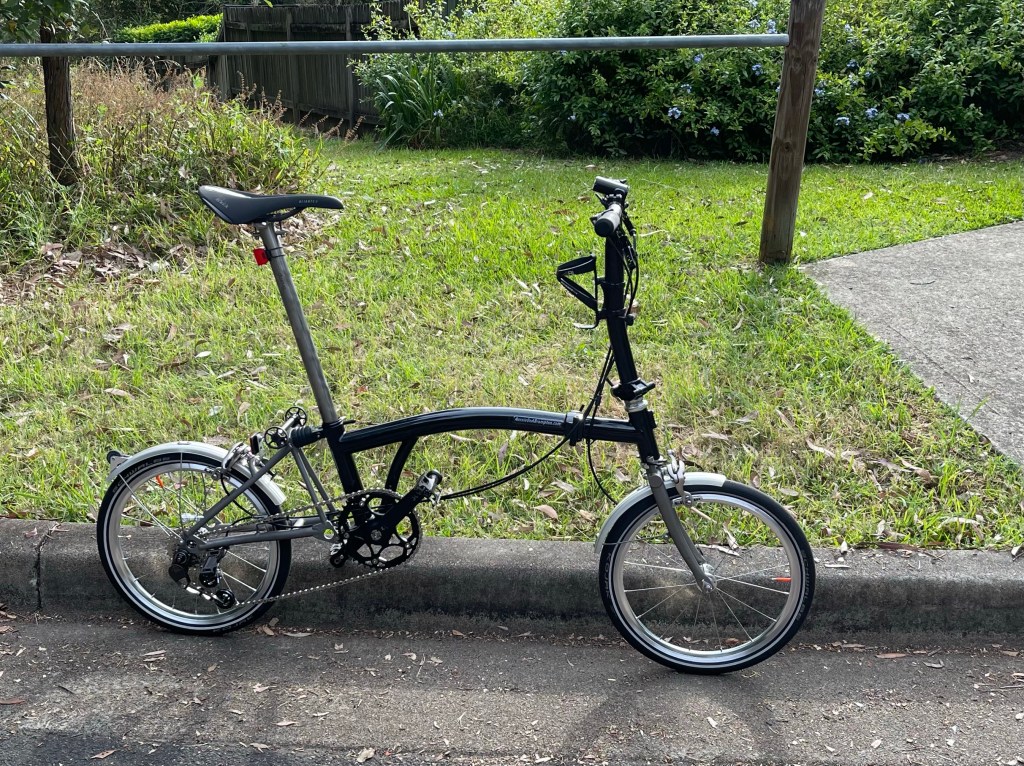
BB (8.05kg)
S6L-X with 42T chainring & 11/13/16/19/22/25T cogs (GIs 62-27)
Even though BB’s 4speed setup was running well, I decided to make use of the 7speed freehub for some differentiation to Clarence. Tried a SunCord tensioner but disastrous, waste of time (wrecked the pusher due to excessive drag/friction in jockey wheel movement, maxxed the dogleg (start to contact with frame) as 5speed-capable only).
Obtained the new Thx4Ride derailleur & shifter & it’s running really well – although the Thx4Ride shifter steps didn’t mate with the 7speed cassette setup, so I’ve resorted to a 6speed cassette (I had to use mostly 9speed spacers, with thicker spacing for the first & last cogs – & a thin spacer to fill up the freehub).
The shifter benefits are that it’s very light (52g), mounts behind the bar (no fold clearance issues) & has a light action – all superior to the SunRace shifter in use with the 4speed setup. It would be nice if it is a trigger shifter but as a thumb shifter I’ve positioned it on the bar for thumb down-shifts & index finger (under the bar grip) up-shifts.
BB’s operation is delightful. Rudolph may have my lowest gearing option but the lightness of BB seems to put the two on a par?
A 4-cog setup on BB has been an on/off, frustrating affair but now I may have resolved it!
An(other) inspection of the derailleur cable system confirmed that the cable had enough movement to suit 4 cogs but that the derailleur pusher wing-plate was restricting the rotation of the pusher, thereby causing inconsistency in shifting to the low cog (depending on cable tension, temperature, day of the week, etc?)
Some filing of the low cog wing-stop & all seems well?
My conversions of some of my Bromptons into external gear 3speed & 4speed lightweight bikes is a personal thing, creating Bs that suit me & my limited power generation capabilities. I think that “power hides things” & I was bogged down by/with 3 factors; slow tyres, IGH hub drag, excess bike weight
Rudolph (Chpt3 v2 S6E-X) was “illuminating”, with fast tyres & a lot less weight than Clarence was running (S6R with Marathons, Brooks saddle, etc, etc). At first I couldn’t put my finger on what was holding back Clarence but once my experimenting with a 2speed rear wheel (acquired some time before, for “the parts bin”) & swapping accessories & tyres, here was a B that was lively & effortless (in comparison). With Covid lockdown (#1) & noticing lightweight parts available, the journey began!
Becoming aware/awake to component weight differences, I’ve tried to limit extras & only replace parts with lighter items. My extras are lights, bidon cage & essentially, a roller wheel extender to primarily protect the Ti rear frame “ears” (having seen a lot of pics of broken Ti frames with savaged roller wheel mounts, I’m hoping the extender is “insurance”?). Probably my first weight-saving consideration was the seatpost area. With a steel seatpost, Pentaclip & Brooks saddle weighing about 1kg, my replacements provide a saving of 500g – hence my following of the Brompton proverb, “Look after the grams & the kilos will look after themselves”. Nowadays there’s very little steel bits left on Clarence & BB, just the mainframe & stem?
Tinkering to improve/tweak performance has come from countless people before me, their tales littering the Internet. Lockdown learning skills & capabilities has shown that the tolerances to modify parts is tiny & often I’ve had to marvel at the original Brompton parts & design. I’d have to say that many of my Brompton tweaks require a “mechanical sympathy” & aren’t going to suit everyone – eg the SunRace shifter is great; I just need to feel when to feather the lever a touch! The whole derailleur system needs precise setup & variations between components & frame tolerances can make for some frustrating/baffling times – eg BB’s 3speed vs Clarence’s 4speed, where exactly the same derailleur & shifting components are used – but with different wheelsets!
So, to now see Brompton’s new P Line Urban models released is partly justification & reflective: I’m content with my creations but now I get to see how Brompton would do their redesign. In brief, I’m impressed/awed/appreciative – & already frustrated to see the “social media knockers”. I’m suspecting the first bike reviews to make many eat their words (hopefully not me?).
Perusing Brompton’s website (& apologies for pinching all the pics below) reveals countless touches – many unexpected. The P Line Urban seems truly a 2speed redesign, where the factory have noted flaws & taken their chances.
My main observations:
• The rear frame ears
• The external mudguard stays
• The 2-position seatpost locking
• The Pentaclip redesign (with oval saddle rail suitability)
• The derailleur design
• The rear hub design (& tweak possibilities?)
• The new 20spoke front wheel
• The roller wheel frame
• The website Support section videos
• The engineering efforts throughout
An earlier video? Due for replacement?
Now let me see, what weight savings could there be? Hmmm… golly, Clarence & BB are under threat!?
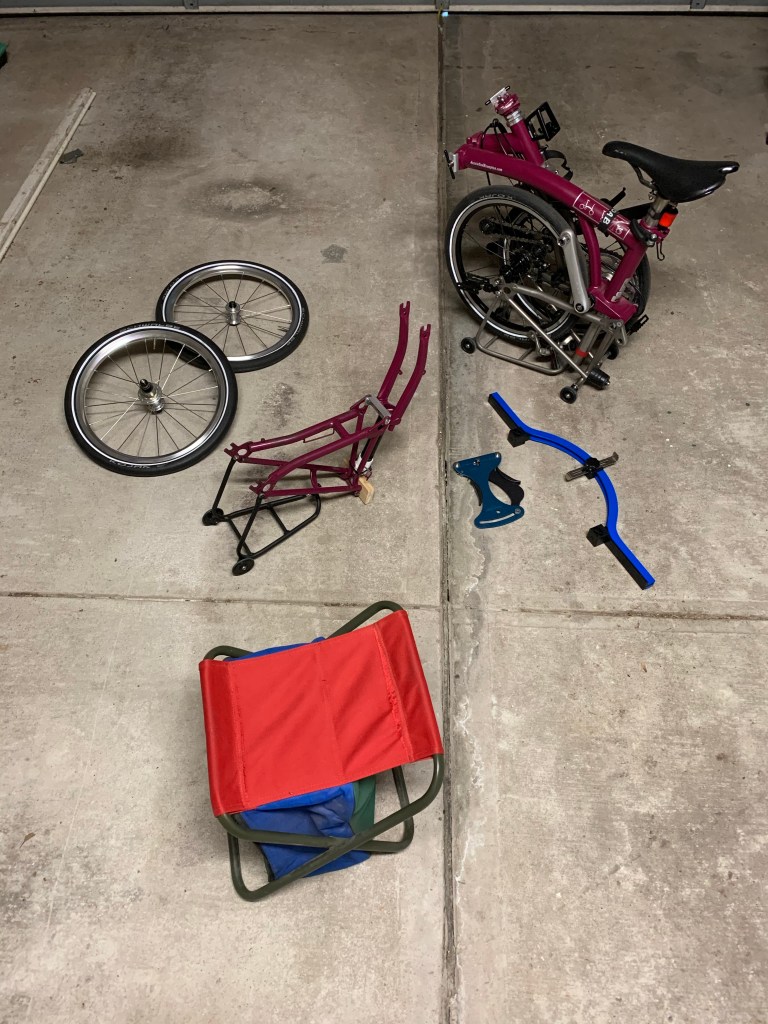
Lots of Brompton fettling during our Sydney Covid lockdowns, mainly 3 older IGH bikes transitioned to Ti lightweights. Plenty of time to await parts, learn skills & tinker? New things for me were Ti fork & rear frame changes, lightweight headsets, Ti BBs & even wheel rebuildings. It’s all just Brompton Meccano really!
In preparation for finally being able to revisit our MidCoast beach unit (woopee, we got there last week!), I also resurrected some pre-Brompton steeds from storage, deciding that the coastal strip would be a good home for them.
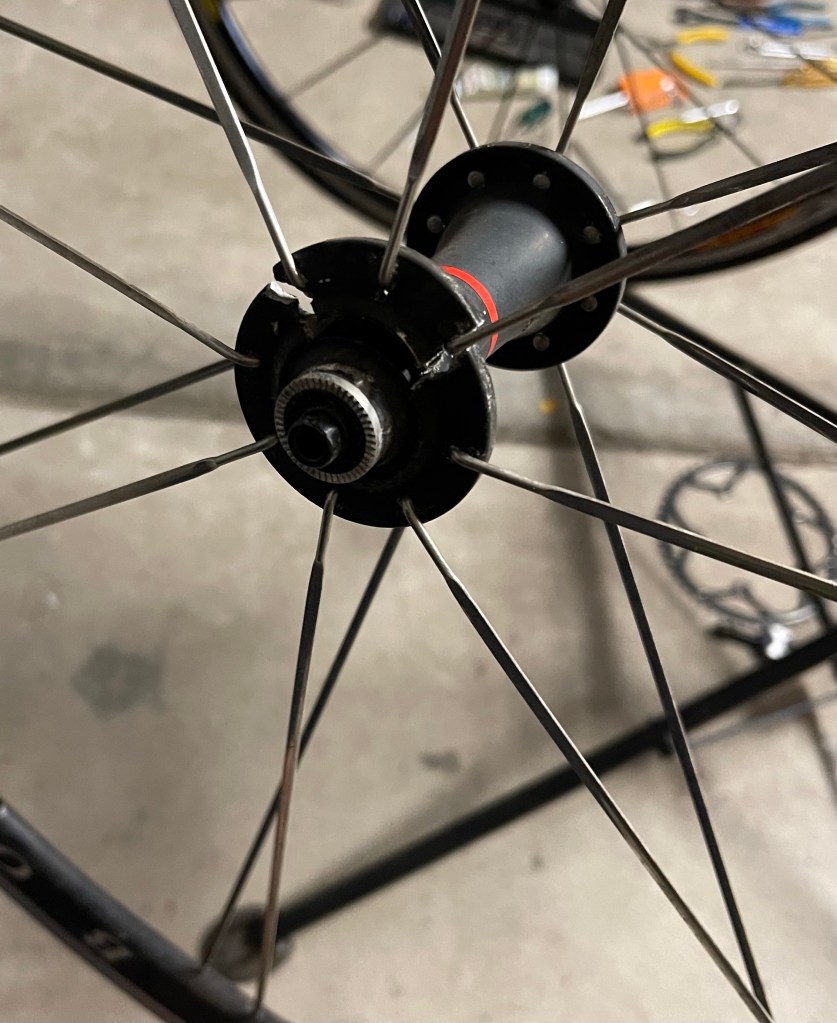
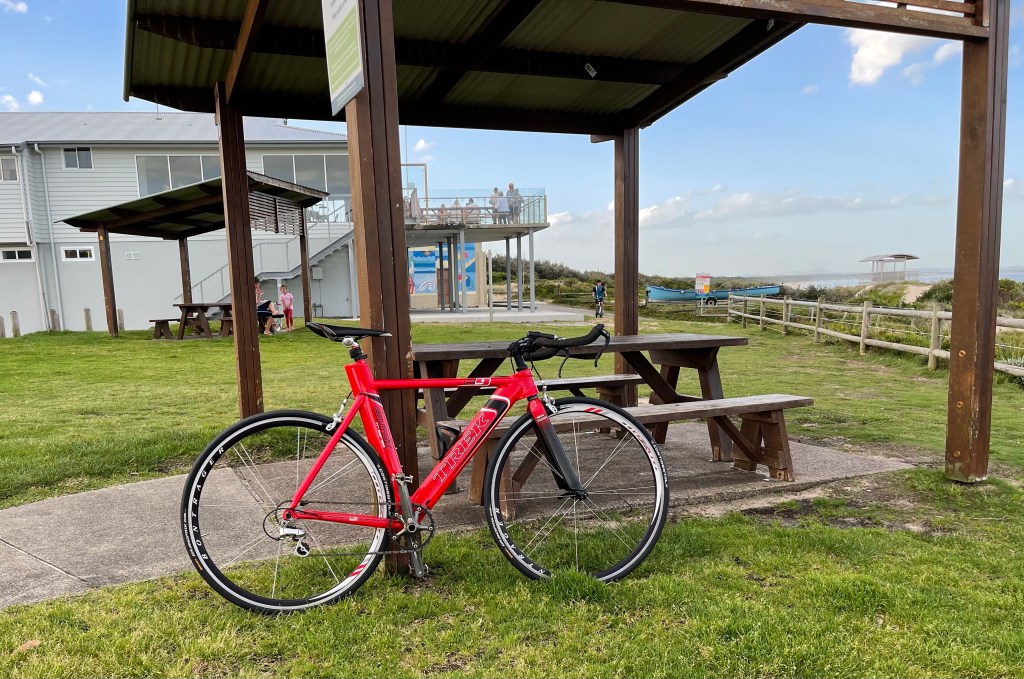
The 20year old Giant MTB got by with a wash & lube & seems almost as new. I also had thoughts that the Trek TT bike would suit conversion to a single-speed beach cruiser, however plans got adjusted. The bike wash revealed an “exploded front hub” (something I discovered that era Bontrager aero wheel type was renowned for, but I could hardly claim warranty after 12years in storage!).
After retrieving another wheelset, I pushed on & stripped the TT bars & removed the large chainring. Instead of a single-speed setup, I used the rear wheel bar-end shifter & mounted it to the bullhorn bars (trying to make use of components wherever possible). With a single chainring & a 9speed rear hub, I cut back the cassette cogs to 7 to ease the chain line & dispense with the highest gears. Adjusting the derailleur limits for the 7cogs was perfect & it all seems to function well. (The setup has a 39T chainring & 13-23T gearing, pretty suited to my beach side cruising needs? – & now with a bike weight of 8.5kg)
Playing around with all this older technology made me aware of the likely difficulties of replacing parts in future, so decided to retain the Bontrager wheelset if possible. Finding a low spoke count front hub took time & when I dismantled the hub I discovered the rim used “hidden nipples” & that I couldn’t re-use the bladed spokes in the new hub! Very fast service from a WA spoke supplier & another wheel finished in quick time, if I may say so myself?
Only a couple of rides so far & I’ll need time to reacquaint with the twitchy TT handling – & I hope the locals aren’t upset about the rear hub buzz? (very loud; who needs a bell?)
• S11R-e GrinTech motor kit added, September 2016 (name: Ralph-e)
• S11E “naturally aspirated” during Sydney lockdown, June 2020
• S4E-X converted during Sydney lockdown #2, August 2021 (name: BB)
• S3E-X wheelset change, September 2021
Some drastic changes but maybe not as insane as they seem?
GrinTech mode was setup after giving up on waiting for Brompton’s e-version release. Very successful mod, although folded weight (23kg with battery) was sometimes awkward. Also, torque-sensing power delivery didn’t mate well with my health issues (“fatigue on big hills meant reduced pedaling effort, resulting in reduced power”; config best set to provide power at low human watts input; later GrinTech motors similar to Brompton version weight)
After my Chpt3 purchase (Rudolph) & finding that I could ride comfortably with an easy-rolling light bike, I removed the GrinTech kit during Covid-time & tried to get Ralph as light as possible & to compare with Rudolph & Clarence (now S4E-X modded). The project almost got to Rudolph’s weight but my conclusion was that the Alfine hub drag was too much for me. (The Alfine IGH was a good range of gears but suffers from increasing hub drag as you change to higher gears. Ralph may cope better with hills but elsewhere Clarence rolls so much more effortlessly.)
Lots of thought on whether I was likely to use (& enjoy) the new Ralph but it seemed inevitable that I ought to let Ralph go to a new home? Another lockdown & I decided to make Ralph enjoyable for me – by doing a Clarence act. So, now I have Clarence & BB (ie Black Brompton, Bitza Brompton, or whatever feels right as a name?) in similar but different configs. Clarence’s spec as a S4E-X now stands at 9kg, with mini rack & standard Brompton lightweight wheelset – sorry Brompton, your newly released P Line doesn’t interest me; too heavy, lower range of gears & “Clarence is already here” – in my favorite colour!
BB’s spec is a S3E-X & has various lighter components to weigh in at 8.3kg. Once again, lighter & a better range of gears (11/14/19T) than a new P Line version – although I’m sure Brompton’s new 4speed shifting is better integrated. (I’d like to say that I’ve given up trying to run BB as a 4speed; lots of tinkering but various factors involved (tensioner distortion, shift cable tension, derailleur clearances, wheelset hub dimensions, etc) but BB’s 3speed runs so well that I’m content – & resisting looking for any expensive bits/kits that may help?)
I suppose I’ll never decide which of my Bromptons is best. They all suit different situations & it’s always a difficult choice for a ride. Clarence & BB are so light & lively that porky Rudolph often gets overlooked?
A lot has happened/changed in 2020 & our Brompton front is also rather different now.
Lots of tinkering has seen both Clarence & Peregrine swap from S6R models into lightweights with 3speed external gearing. Peregrine has lost about 3kg (now weighing 10kg) but Clarence has seen a bit more work in getting down to 8.7kg. Everything is running smoothly & delightfully after all the part sourcings & conversion work.
We also have 6speed lightweight twins (of sorts), after Rudolph has been joined by Ruby, a S6L-XD version that was obtained late-2019 in grey livery. Unfortunately the mainframe hinge had an issue & Brompton Australia (ta) obtained a replacement frame in House Red colour (grey no longer being available).
Having gained skills in rear frame & fork replacement, headset changes & external gearing tweaks, I’m figuring that wheel building skills ought to be next? How hard can it be? I’m nearly ready to go…
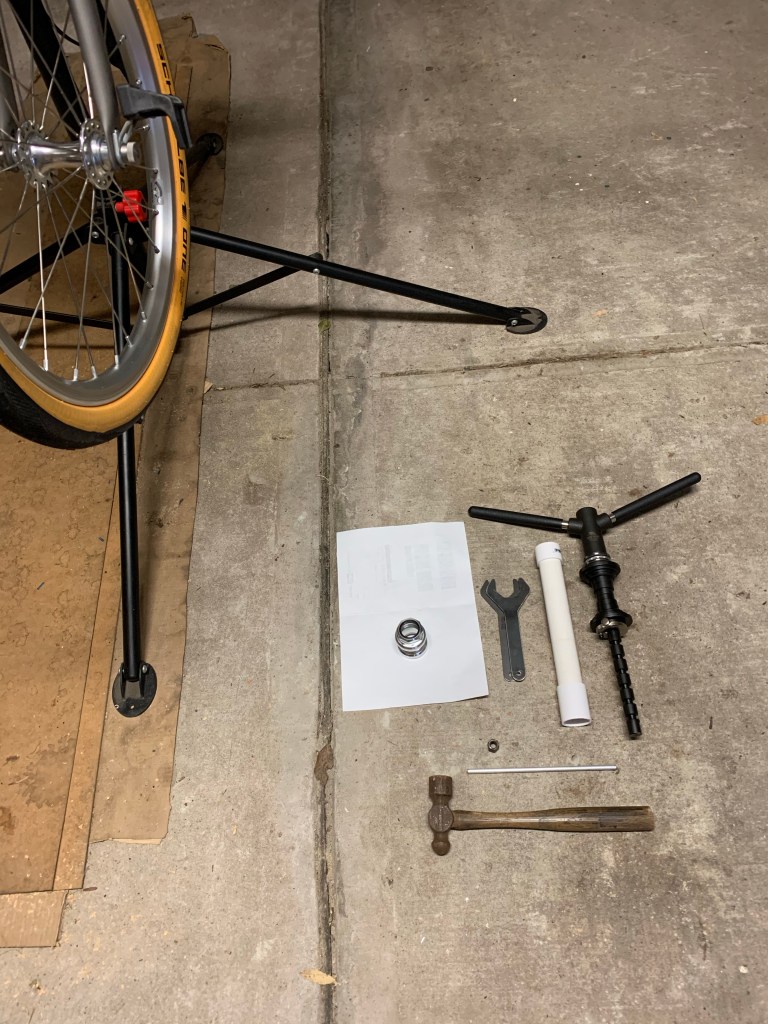
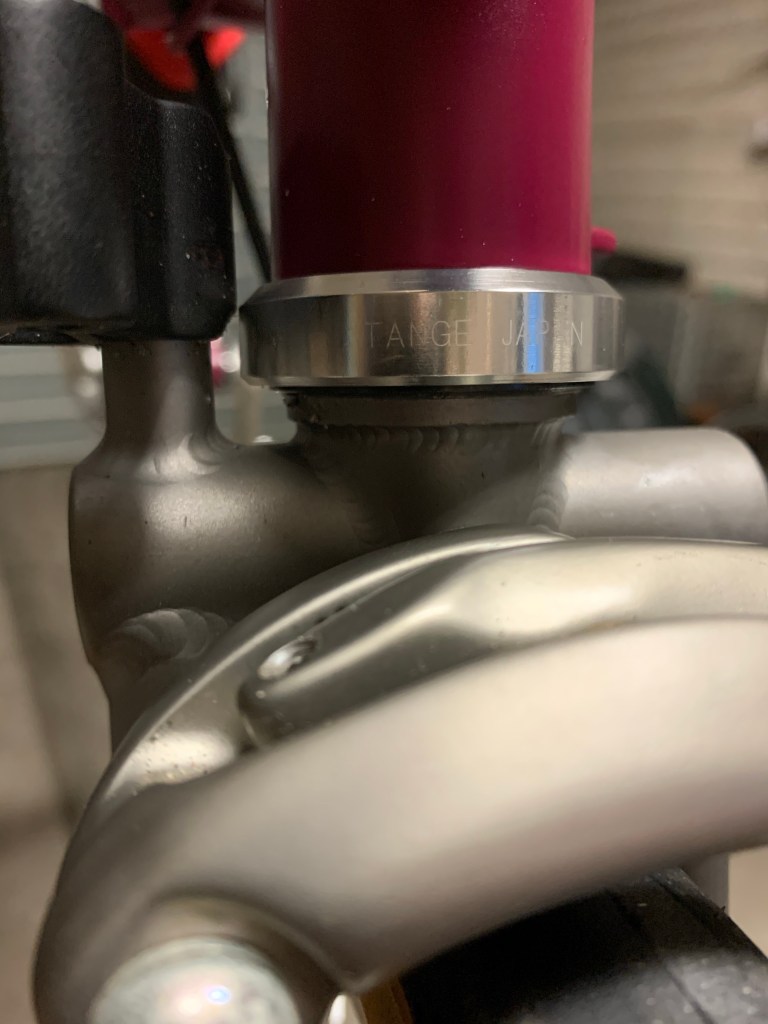
Some “elective surgery” today; a lightweight headset for Clarence.
Having earlier installed the Ti fork, the full headset swap seemed too tempting. I considered creating my own headset cup press tool but then I realized some cheapish tools were available so I took the safe path with my own purchase. The operation was precise & very smooth; all involved happy with the outcome.