Chicks away

7:30 am this morning I spotted two Brush Turkey chicks around the nest established in the backyard during our UK absence. Finally, the daily visits from Poppa, or Mr Brush Turkey, may be at an end? No more tending the nest, checking the temperature, redistributing leaf litter, twigs, branches, rocks & whatever his claws would flick up, no more attacks on the remaining garden to refresh the material over this last 2 months?

Hoping to capture some pics I headed out with the camera, just in time to see them break cover one by one & scamper towards the local bush.

20131121-220755.jpg

Next minute, there was Poppa strutting up to inspect the nest! Over the next hour or so, he dug into the nest at particular points, & dug & dug! At times, so far in that only his tail showed. (Our assumption was that he was checking for any remaining eggs?) Eventually he was done & gone; would he return?

20131121-220817.jpg

Having sighted more than one hen visiting the nest, we had wondered over what period of time chicks may be hatching? Now it seems that all the activity is over & we’ve inherited a demolished nest & considerably more compost material than we started with! Looks like we can reclaim the compost heap & rebuild the garden & lawns? Well, some day soon?

20131121-220849.jpg

Minimalist multi-roles

Well, here we go again; another trip coming up in the Tardis , our VW T5 Campervan. This time however, the Tardis will be more of a T5 Transporter than Campervan, as we’ll have an extra passenger in Mrs Aussie’s Mum.

The trip with “the Mum” has highlighted what we seem to take for granted; that the step into the Tardis is a fairly tall one. Perhaps it was time to get ourselves a little portable step? Looking around I couldn’t see anything that fills our usual criteria of items readily integrating into the van & ideally having dual roles? (Our Tardis is deceptively spacious but can’t match its namesake!)

Another thing I’ve been meaning to do, is setup a support frame or such for when carrying a Brompton in the passenger area. Robinson fits neatly under the bed in the rear but Ralph usually just lays on the floor in the rear passenger area with some packing under the Alfine rear hub to avoid the pointy acorn axle nut digging into the floor. (Robinson is a rack model Brompton & when laid on the side, the rack/Ezi wheels & the MKS removable pedal adapter (with pedal removed) become three points of contact with the floor & makes for a stable package. Ralph has no rack & the wider rear frame with Alfine hub becomes one contact point, along with the MKS pedal adapter & Ezi wheel.)

After pondering the separate issues of T5 step & Ralph’s support system, I realised I could combine everything. I found that my wooden work stand was a good size for a step (albeit not really stable enough) & that the handle bar support legs where ideally placed for supporting a Brompton frame. Turning to my stock of timber off-cuts I then constructed some “support boxes” that would become leg supports for the step, supports for keeping Ralph’s acorn axle nut off the floor & also a seat protection pad for when using the work stand in its original role.

Enough of trying to explain all this in words, let’s see some piccies of the work stand in a multi-use way – step, mobile stand & support cradle (& when not in use can be stacked on the side door sill beside the sliding door).

20131119-200310.jpg

20131119-200350.jpg

20131119-200440.jpg

20131119-200522.jpg

Hopefully that’s all made sense, although perhaps I should clarify:
The work stand fits any of my bikes & usually sits in the garage but I’ve often missed it while on a trip. Now, with the recent Aldi purchase of a work stand, my mobile work stand may stay in the Tardis?
I don’t expect to carry both “the Mum” & Ralph on the next trip (Ralph will stay home & other bikes will be on our rear bike carrier).

Up-market servicing

It was meant to be, it was fate! After many years making do with cobbled bike work stands & support systems, it was pointed out to me (while in the shopping centre) that Aldi was having one of their bike stuff sales – & that a work stand was included! I’d never been enthused to spend lots of money on a super-duper work stand but maybe this one would do? Finished my coffee & trotted along & sure enough; a cheap work stand & probably good enough? After all, it did say, “Fits all bikes” on the box?

Back home & assembling it but noticed that the in-box instructions now said, “Fits bike tubes from 25 to 40mm”!? Oh well, maybe ok for the other bikes, if not the Bromptons? Here’s a pic of the assembled unit (with some irrelevant extra bits):

20131117-102129.jpg

Trying the stand with Ralph highlighted a few things. The bike tube clamp was just big enough for a Brompton, although it would have better that the hinge have a cantilever arrangement in order that the clamp jaws were centred on the tube (ie the shape of the jaws ideally suit the smallest tube size but when the clamp is opened fully, the jaws give the impression of “fingers squeezing a lemon pip”?) I will probably fabricate something to get the clamp hinge further apart? Soon…

20131117-102158.jpg

The alarming thing I found with using the stand with a Brompton, is that the clamping area on the mainframe tube is not the balance point. With more weight to the rear, you have to have all clamps done up tight to avoid the Brompton rotating! I pondered this for a while & then rummaged around the garage, resurrected my first version of a luggage block adapter, bolted a bidon cage to it, popped in a large sized tool container & filled it with garden pebbles. Hey presto! – a counter weight.

20131117-102220.jpg

Mungo tweaks

Pre-Brompton came Mungo, a Dahon Vector 27-speed 20″ wheel size folding bike. With thoughts of traveling & not wanting to go through the difficulties of transporting a full-sized bike via airlines & rental vehicles, Mungo gave me a near-road bike feel & with a good range of gears. However, Mungo also showed that it was still going to be a case of disassembly if I hoped to travel with an airlines-compatible single case or soft bag & avoid needing a larger-sized rental car. Fortunately, 2 Bromptons unexpectedly/miraculously came along via eBay “Buy now” purchases & Mungo lost out on seeing the world? (As has Daisy, a Dahon Vitesse 18-speed flat-bar model that Mrs Aussie also found via eBay.)

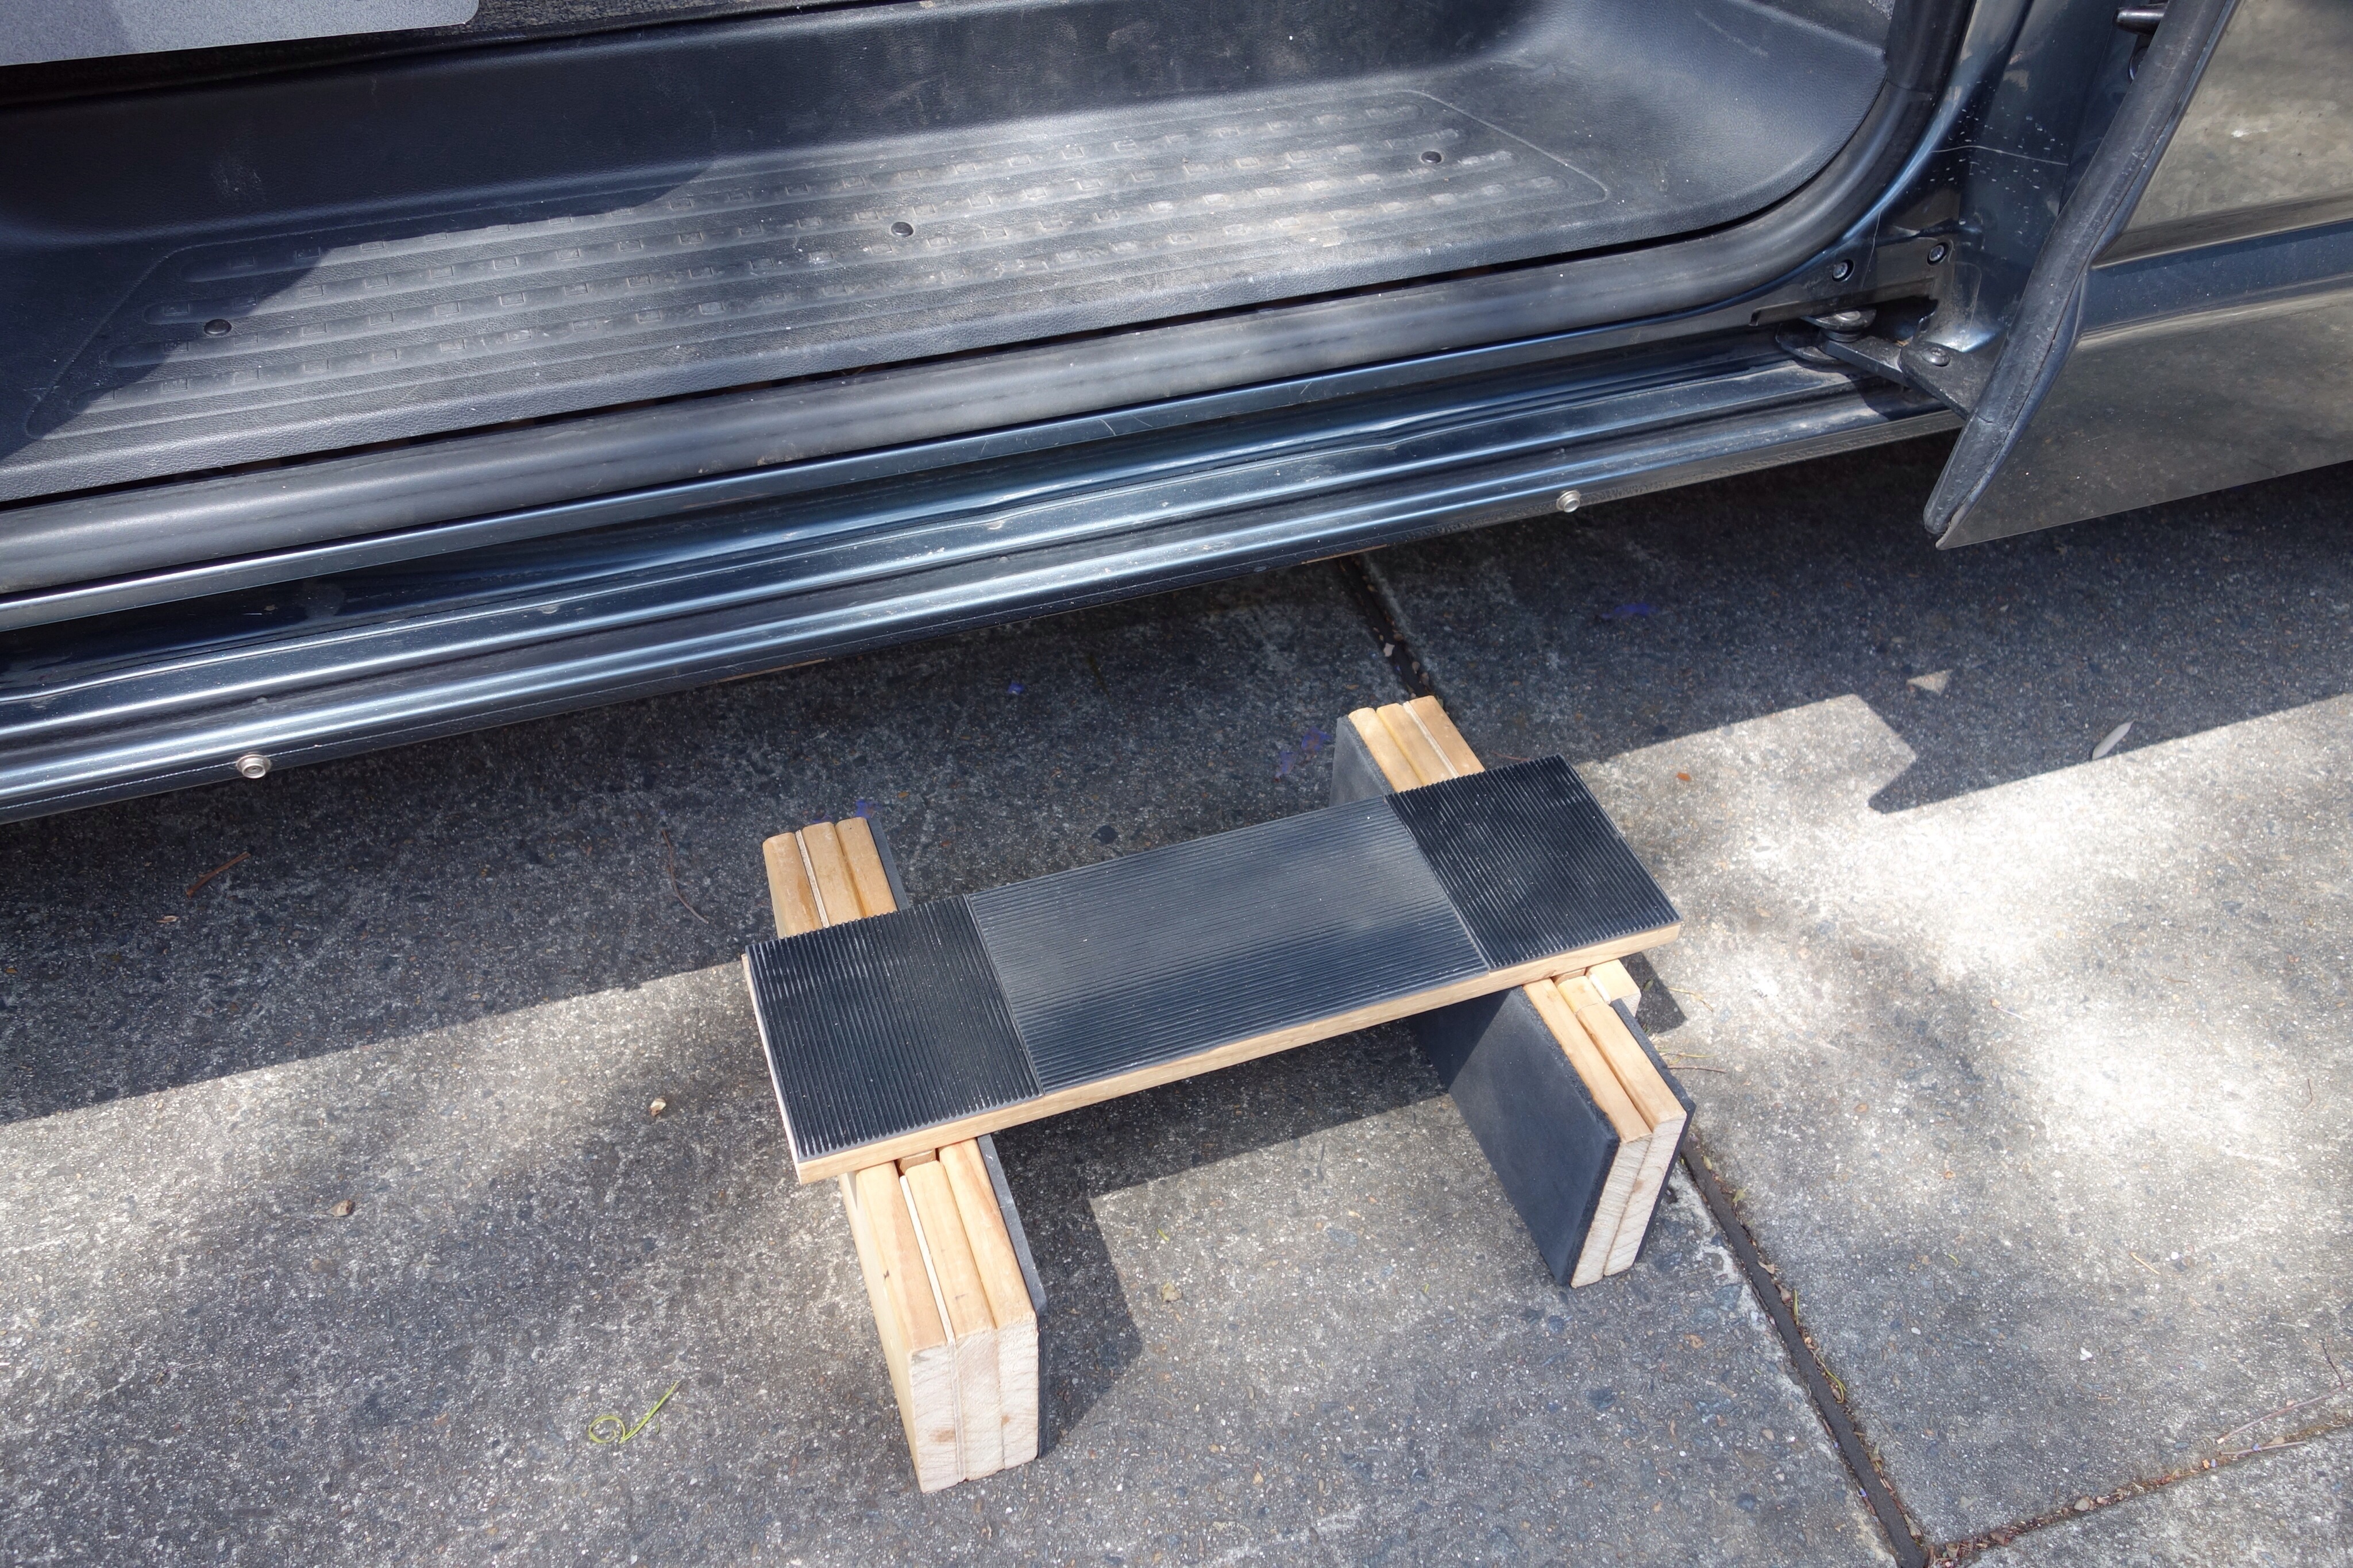
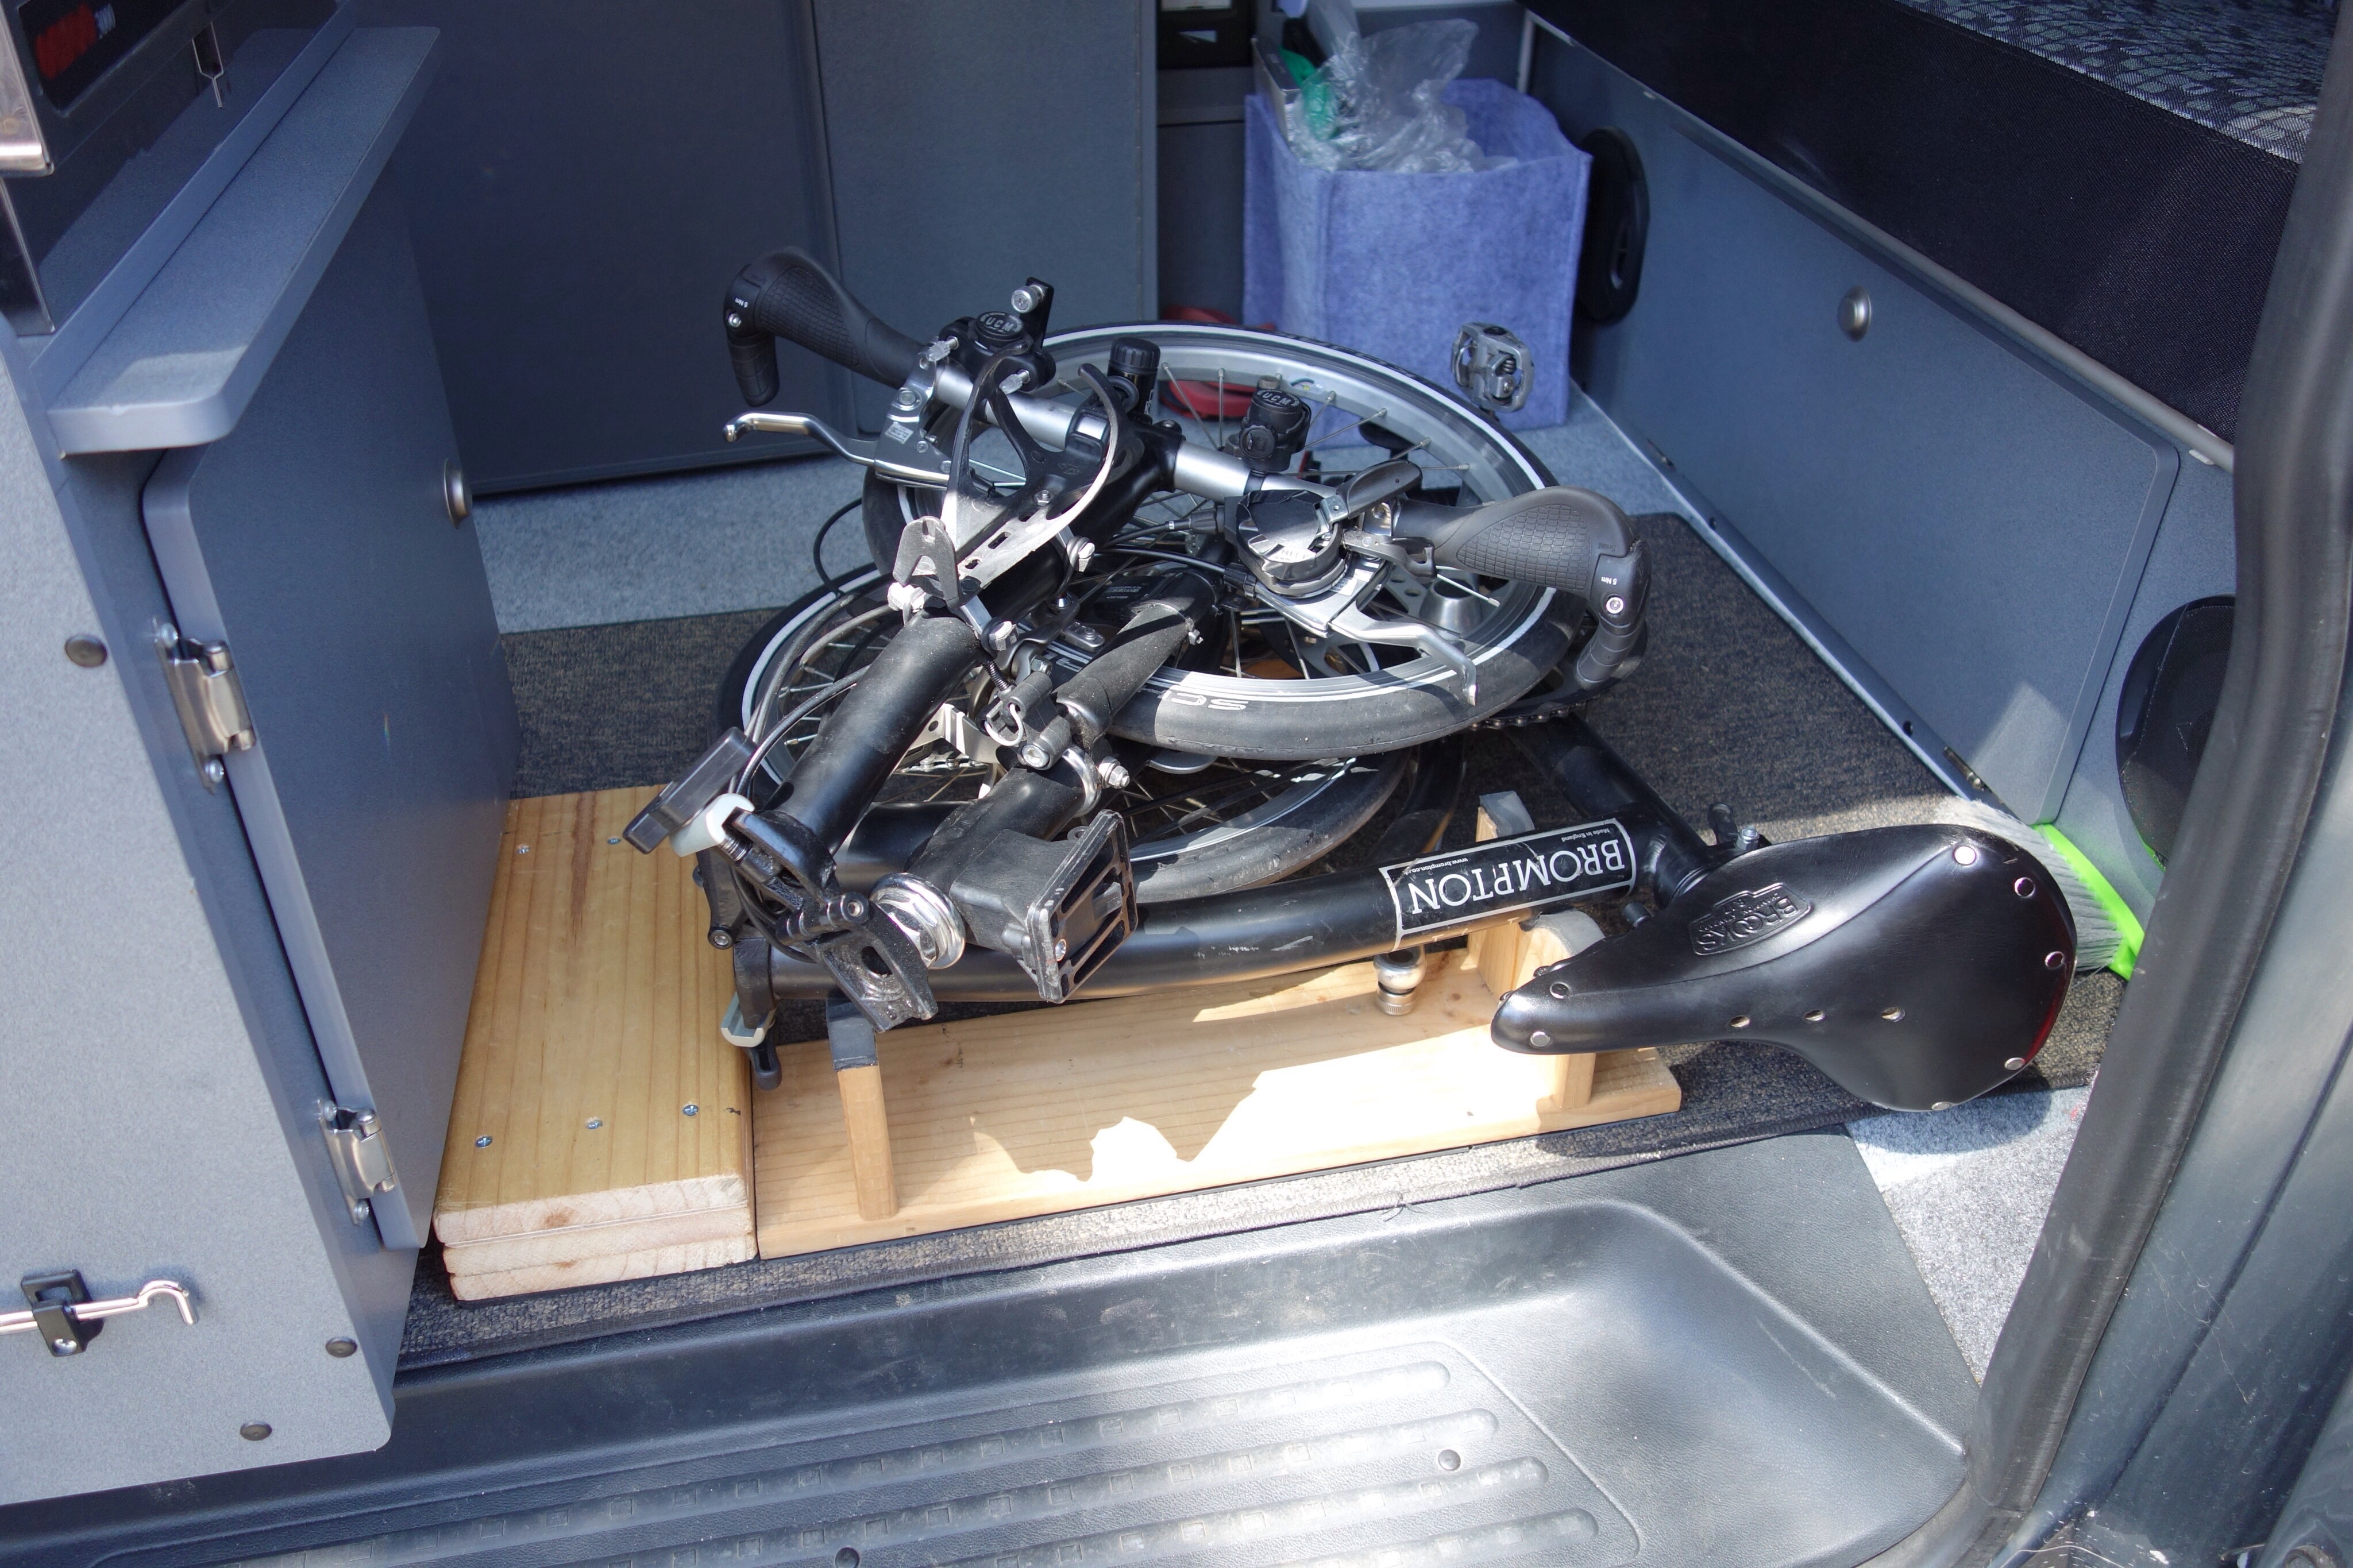
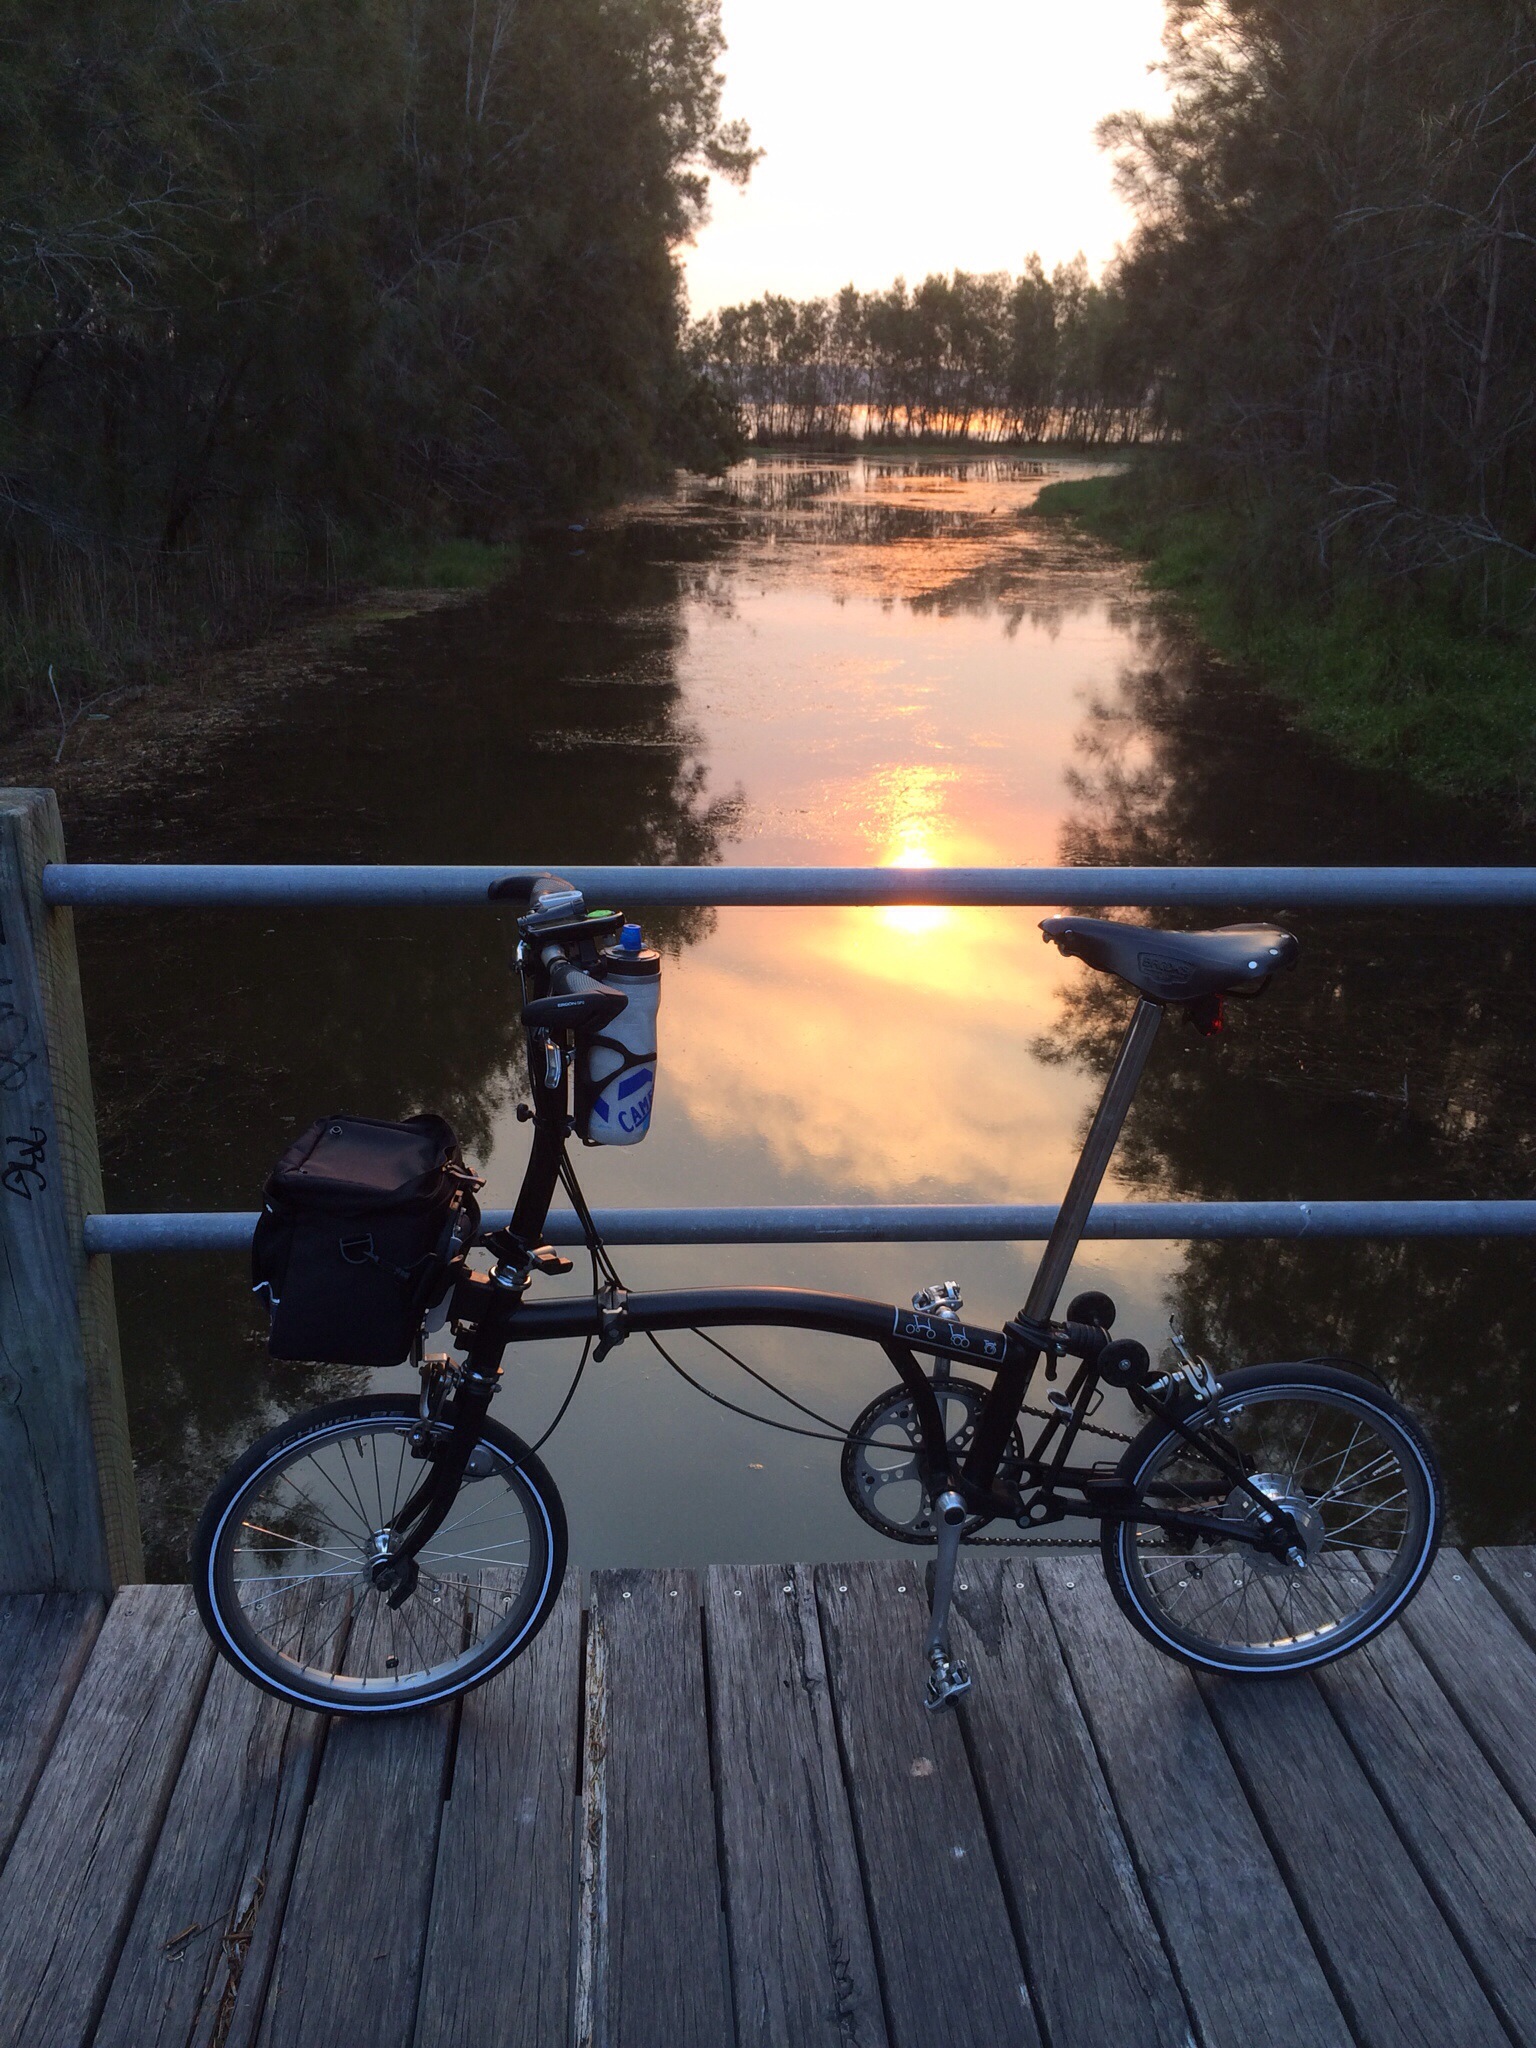
Another purchase for local travels & trips has been the Tardis, our VW T5 Campervan. While our T5 has a good spot for one Brompton in the rear compartment under the bed, a rear bike carrier is necessary for whichever of our bikes go with us on multi-day trips. Mungo & Daisy fit well with the Tardis trips; all-purpose bikes with mudguards, side-stands & nice rides but with the added benefit of foldability for storage when we don’t want to lock them (unfolded) on the bike rack.

Warning: some paragraphs follow that involve mathematics. Perhaps you may have a need to scroll/swipe to the last paragraph & pic?

What an all-purpose bike also needs, is a range of gears that will suit most terrains that our trips take us to. Rather than just test riding a bike up every hill you can find, to see if the gear ratios are suitable, a means of comparing gear ratios is to obtain/calculate the “Gear Inches” (GI) by multiplying the gear ratios for bottom & top gears by the diameter of the wheel. For some people this may be somewhat difficult but for me I’ve already dug out the hub gear info (eg via Hub Gear Calculators on the Internet), I can count the teeth on the rear cogs & chainrings, & I can measure the wheel diameter. Actually, this last item is usually very difficult if you’re resorting to a tape measure so the best way is to calculate the diameter from the ETRTO size on the tyre. The ETRTO size for a Brompton Kojak is 32-349 & the formula for calculating wheel diameter in inches is (2×32+349)/25.4 (ie 413/25.4 = 16.25). An additional tip if you want to set your bike computer wheel size, is that the wheel diameter of 413mm can be multiplied by Pi to give the wheel rollout distance of 1297mm. How’s that? & all without needing a tape measure!

Getting back to the GI calculation & using Ralph, my Alfine 11-speed Brompton, as an example, the low speed GI is 50/18×0.53×16.25 which equals 24 (ie chainring teeth divided by rear cog teeth times hub low ratio times wheel diameter). The top speed GI is 50/18×2.15×16.25 = 97 & therefore the GI range can be expressed as 24-97. Once we get the GI for other bikes you can start to compare how the bikes would cope with hills (or even how they might compare for top gear speed?)

Before I eventually resume my tale about Mungo, let’s compare some GIs. A typical road/race bike that uses 53 & 39 teeth chain rings & an 11-25 teeth cassette has a GI of 41-126. A mountain bike could be about 17-105, while Robinson, my 6-speed “reduced gearing” Brompton is 29-88 & a 3-speed Brompton would be about 44-79, depending on options. As you may see, nothing beats an MTB on being able to climb hills – just as long as you can keep the front wheel on the ground? Also, if you want to go fast on your Brompton on the flat then you’ll have to pedal like crazy to be ahead of the race bike.

The beauty of Mungo is the feel of riding a road/race bike with similar gear shifters & fairly light weight, as well as a GI of 28-123. This comes from the small wheel size, a 53 teeth chain ring, an 11-26 teeth cassette & 9-speed rear derailleur but also with a 3-speed SRAM dual-drive rear hub (similar to the 6-speed Brompton with a 2-speed derailleur setup & a 3-speed hub?). A scan of the above GI figures should show that Mungo is ably suited to getting up hills, as well as being pedaled fast.

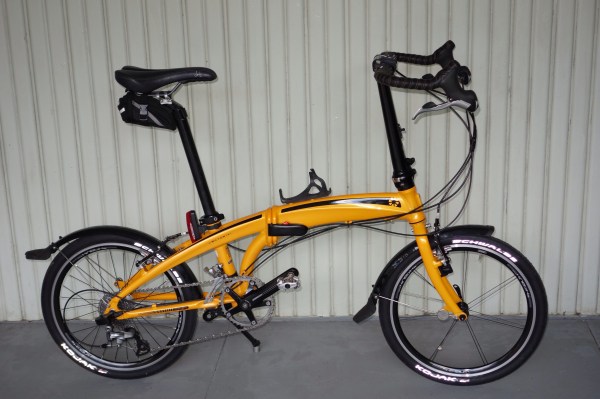
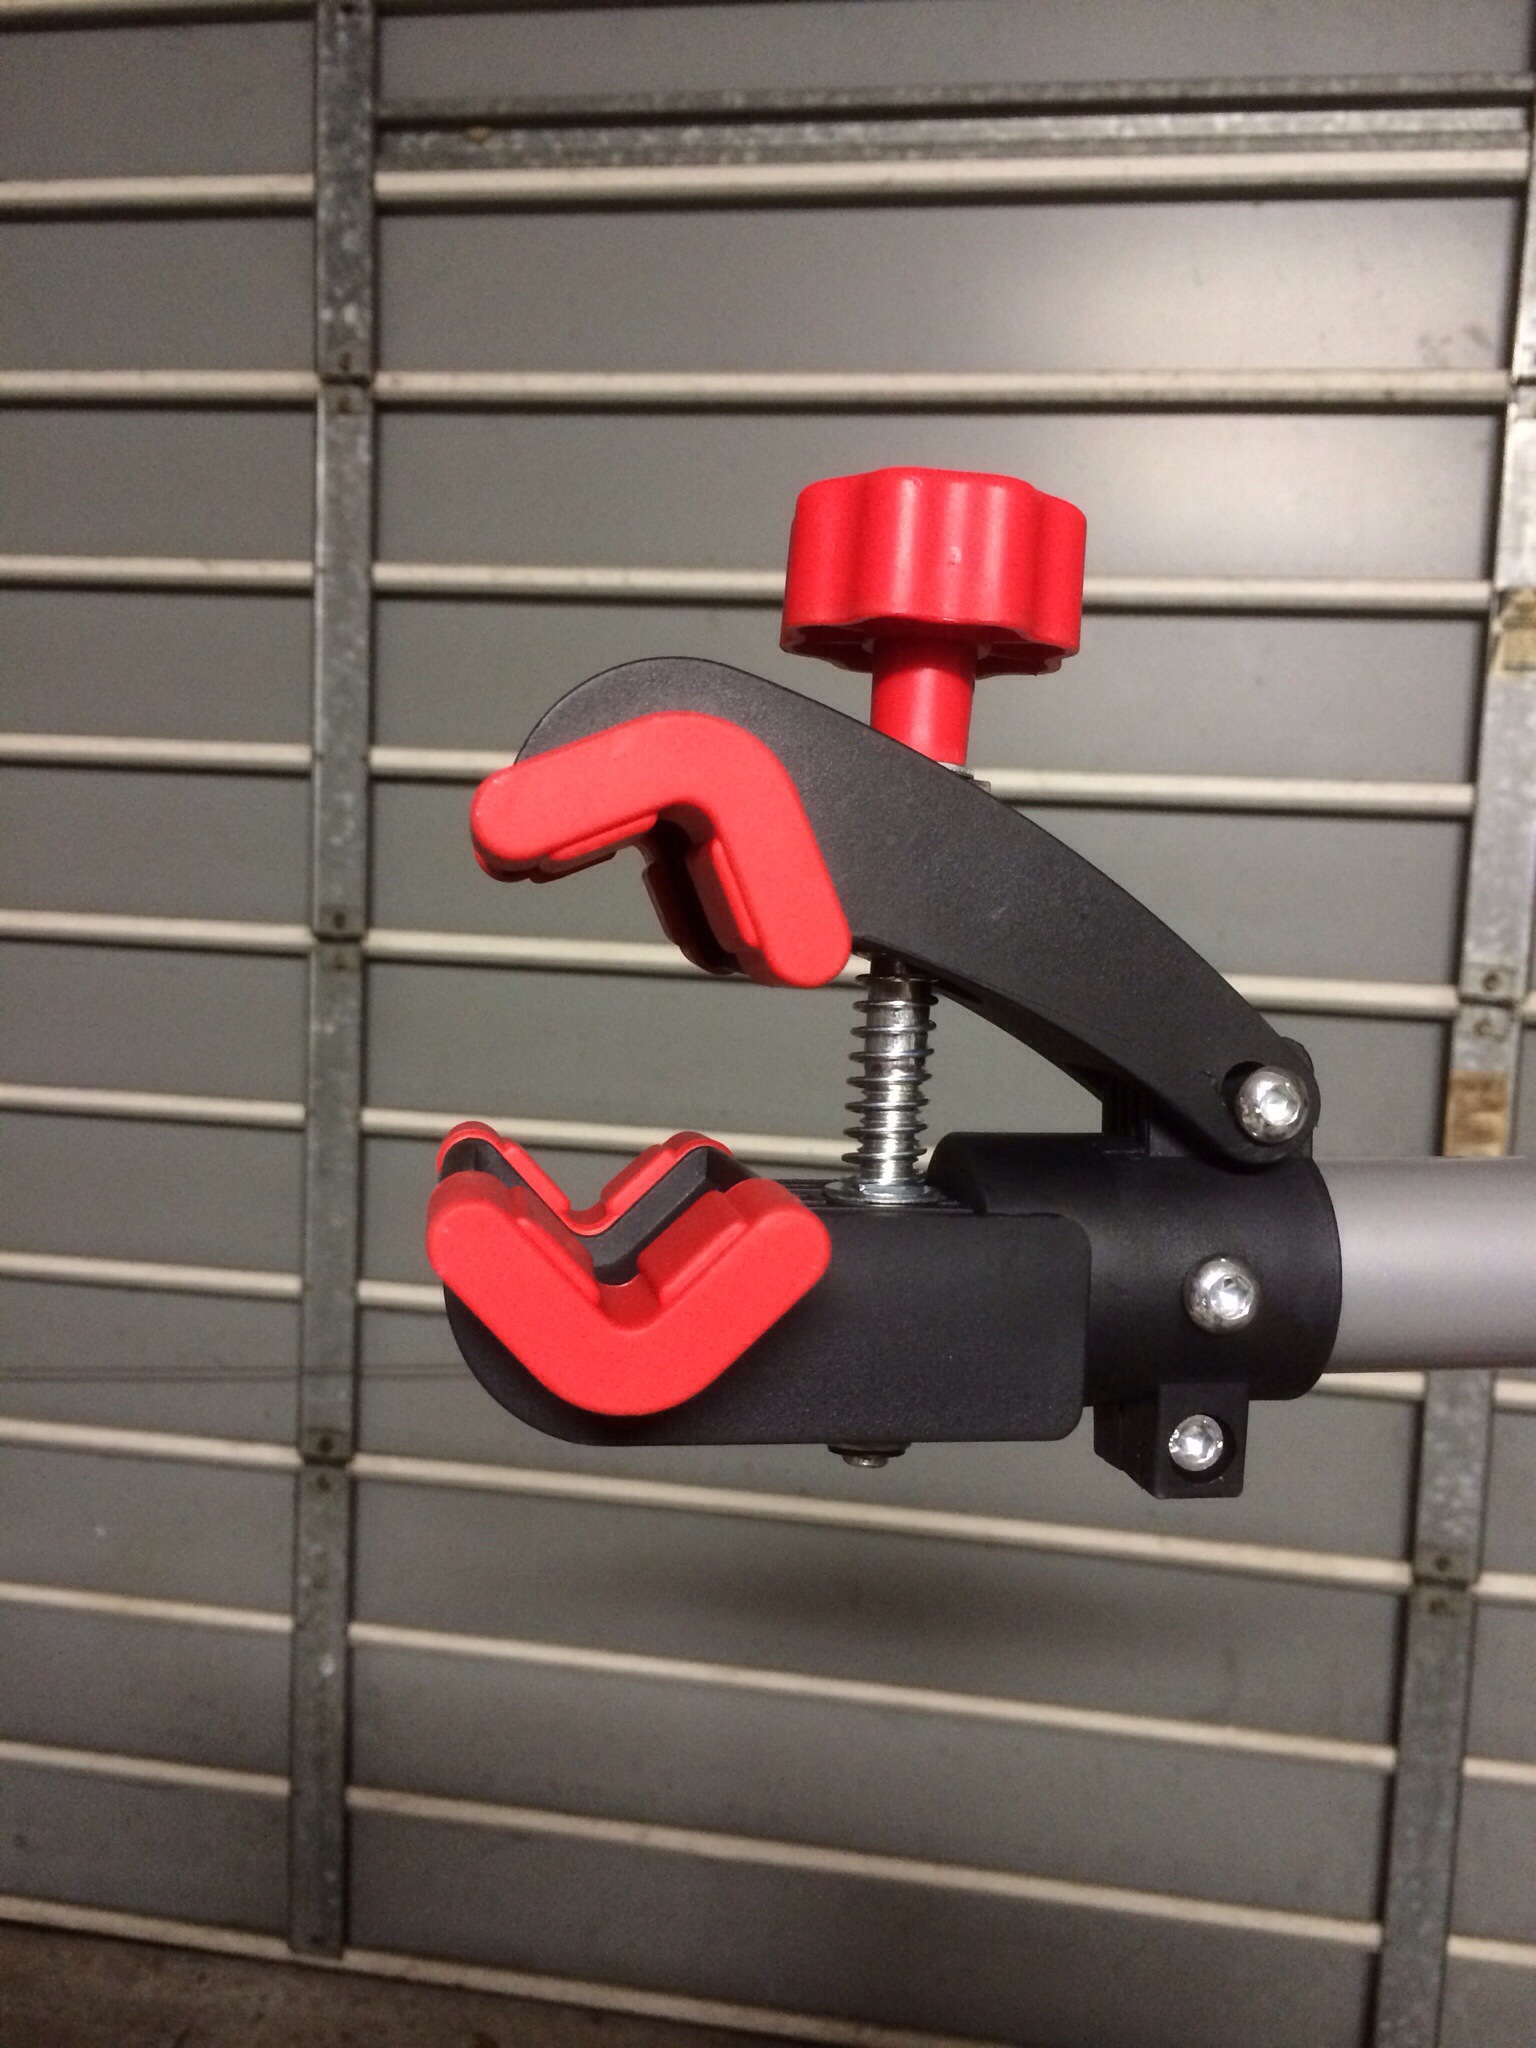
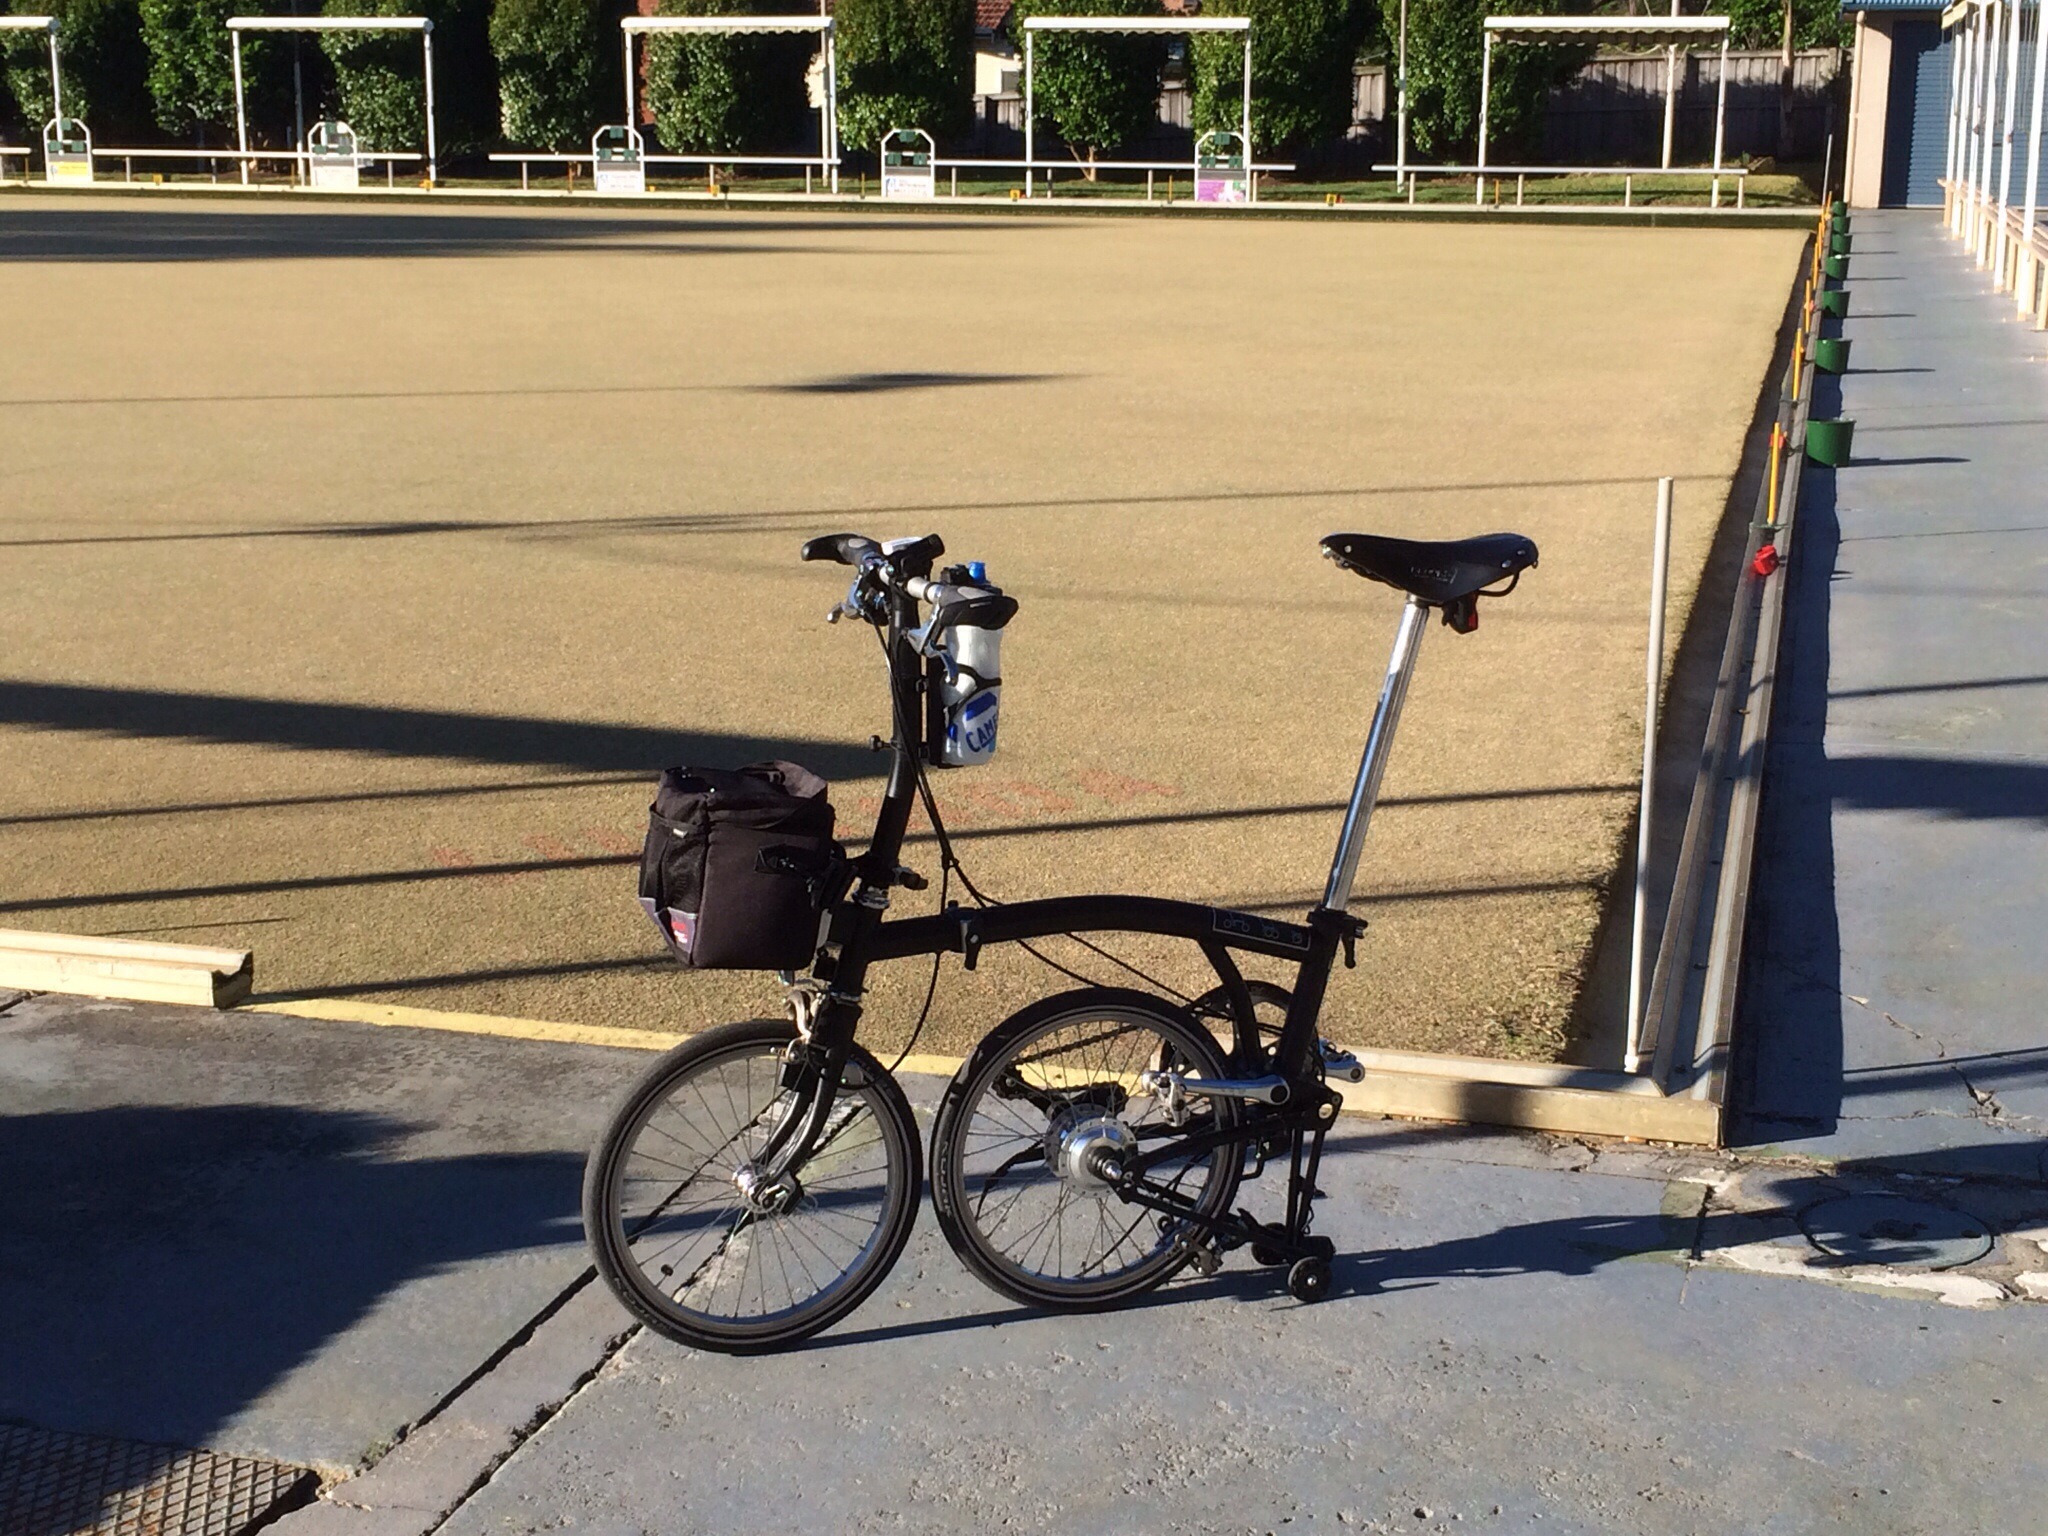
Unfortunately for me, my heart-related limited blood/oxygen capacity (refer earlier blog post Hill performance for info) still puts Mungo (& me) at a disadvantage when I compare it to Ralph’s low speed gear climbing ratio. Having resolved Mungo’s original tendency to drop the chain when in top gear (by fitting a fixed front derailleur to contain the chain onto the front chainring) & considering that Mungo’s missed out on any overseas trips, it seemed a shame that Ralph could be preferred for climbing hills reached while on Tardis trips? No, Mungo wasn’t going to lie down & its standard crankset size suggested to me that a 39 teeth chainring from my box of bike bits was going to be a good swap with the usual 53 teeth item? So, here’s a pic of Mungo now equipped with the smaller front chainring (which provides a GI of 21-90, seems to escape the MTB tendency to wave the front wheel on steep hills & still gives a top gear “adequate” for my current capabilities?). Mungo rides again?!

20131111-160315.jpg

Nest status

Following on from my earlier post “Back to the nest”, our visiting anti-gardener, Mr Brush Turkey, continues to pop in to checkout his nest & can be seen every day testing the nest temperature & topping up or adjusting the mound to suit. At times there are also female visitors to assist the work but we’re unaware of how many females have laid eggs & when that’s taken place. It seems the chicks will dig themselves out eventually & make their own way in the world; we’re just hoping there’s a clear sign as to when we can reclaim our compost heap & start work on building a new garden?

20131104-235350.jpg

New old new levers

I’ve recently received a new set of the original Brompton Toolkit tyre levers. As mentioned in my blog post “Toolkit testing”, I’d had a little whoopsie when trying to remove a Marathon Plus tyre from the rear Sun rim on my Alfine 11-speed Brompton & was left with a broken tyre lever. When Brompton withdrew the Toolkits from sale, until the latest design of tyre levers is available, I was under the impression that Brompton would eventually replace the levers for current owners of the Toolkits. Initially I was happy to await the release of the new levers but then I decided to email Brompton to confirm how the replacement process may take place & to flag my ownership of some Toolkits. The communications raised some interesting aspects to the likely outcome.

First, the Brompton prompt response to my query disclosed some information I wasn’t aware of. Their email said,
“Thank you for your enquiry. As you may be aware we have offered temporary replacement tyre levers (the lever has a longer metal tip than the original) to customers via their Brompton dealer or distributor who have experienced a snapped tyre lever. Once the improved version has been finalised and passed inspection we will be issuing dealers and distributors with the tyre levers so they can forward this onto customers who have a Brompton toolkit. I would recommend contacting the dealer you purchased the toolkit from or the Australian distributor for a replacement.
Also I noticed on your blog post you mentioned that you used the tyre lever on a Marathon Plus. We would not recommend using it on a product that is not used or recommend by Brompton (Standard Marathon, Brompton Kevlar and Kojak will be fine).”

So, there have already been changes to the levers? – & I believe my broken lever was of the later design, rather than photos I’ve seen of broken levers that seemed to be composite material? (double-whoops?) Next, my use of the levers is not recommended for Marathon Plus tyres? – & I guess that includes any other rim, tyre or bicycle type? Hmmm…

Anyway, I thought I’d contact the Australian distributor (rather than the UK dealer where I’d purchased the Toolkits) & check what they could do. However, the response here was that as this part of the world never received any Toolkits they also were never supplied any of the replacement levers that Brompton’s email mentioned. All was not lost as they would happily provide new replacement levers when they came available if I was unable to obtain replacements from the UK dealer or directly via Brompton.

Things then got a bit more confusing with emails between all parties. I was trying to say that I was happy to wait for the replacement levers (or obtain them via a trip to the UK, whichever came first?) but I’m unsure what others thought “replacement levers” meant. Before I knew it, Brompton were sending some directly to me (with the explanation that, “…we do not offer direct warranty replacements as the contract of sale is between the end user and the dealer. However given the circumstance I am happy to send you a set of replacement tyre levers…”!?

Overall, a very impressive customer-contact process! Perhaps even “very Brompton-esque”?

Back on track

One month?! We’ve been back from the UK for a month & hadn’t take the Tardis (our VW T5 Campervan) for a trip out of Sydney! With a wedding anniversary coming up, what better way to celebrate than to load the Bromptons, Ralph & Robinson, into the Tardis & head back to Toowoon Bay (the site for our first “shake-down” trip in the Tardis) for a couple of days? The Sydney bush fires were making things rather smoky & somewhat dodgy for what roads may be open but arriving on the coast to a cool sea breeze was a good start.

20131025-104746.jpg

Cruising along the lakefront cycle paths from The Entrance to Chittaway Bay has gotten even better since we were here last, with a lot more concrete pathway & less need to resort to local roads to link the sections of path. The various bridges over creeks & watercourses have come in for some attention although the wooden planks on 2 larger bridges may be still akin to cobblestones? Here’s Ralph resting on one of the good bridges.

20131025-104819.jpg

A beach walk is mandatory for a trip to the coast – as is a coffee stop at a Surf Lifesaving Club.

20131025-104843.jpg

20131025-104905.jpg

Lots of eating places around (aside from the gourmet cook that operates out of the Tardis?) but returning to the local Pizza Kitchen was a must. This time our Mains were pasta – but we shared a pizza dessert.

20131025-104930.jpg

20131025-104953.jpg

Local riding

Away in the UK there were abundant opportunities to photograph sights & rides for suitable blog postings. Back in Australia I expected that this would continue but now I’m reminded why I hadn’t done much before the trip: it seems hard to remember to view the regular happenings with the same mindset?

Take the regular rides for example; I can get through the whole ride without even thinking about the camera! Afterwards I remember that I’ve missed out capturing sights that may have been worthy but it seems the familiarity is working against me? I shall have to try harder! (& keep reminding myself somehow?)

Today I had some success – & remembered to make use of my very recent iPhone upgrade. Not on an extended ride through National or recreational parks but instead, back into regular rides for practice sessions on a recent sporting interest… (for the uninitiated, that’s my local Lawn Bowling Club)

20131015-232407.jpg

Tyre & tube war

I wonder how good the new Brompton double-wall rims are? I’m certainly familiar with the design type on other bikes & on Ralph’s rear wheel (a Sun rim laced to an Alfine 11speed hub). A number of my blog posts have mentioned the Sun rim issue of a rather flat profile & so perhaps no more for this post?

Double-wall rims have the major benefit of the spoke heads being below the tyre mounting area & thus not contacting the tube. Often the rim will have holes in the tyre mount area, that align with the spoke heads mounted in the lower rim. Some rims will even have no holes (aside from the valve hole) & theoretically not require any rim tape. (Note that last careful choice of words, but for this post I’ll say no more about my experience of going without rim tape on some race bike wheels.)

Unfortunately Ralph & Robinson are still running the older style Brompton rims on 3 out of 4 wheels & so fitment of rim tapes is critical. Recently I’ve become aware of an issue that is possibly self-induced but some long-term testing may be required for my fix? Getting back to the rim design (no photos here; just your visualization), the narrow Brompton rim with its deep well means the spoke heads don’t sit flat on the rim bottom surface, but contact the rim part-way up the curved well area & alternately mount left & right of the well centreline. What this does is leave each spoke head at a slight angle & prevent a “super flush” surface. This is where the quality & accuracy of the rim tape installation comes in, to ensure a smooth, complete coverage of the spoke heads (that are just longing to bite into the rubber tube?). My first sight of a Brompton rim with the plastic rim tape loop, alarmed me that the tape had wandered or moved from a path that fully covered the spoke heads (& was so hardened that I couldn’t relocate it), & so I switched to using adhesive-backed cloth tape on my Brompton rims (with a thinner version for the Sun rim).

As the Brompton brake calipers don’t have a quick release mechanism (I haven’t changed the subject; stay focused), I prefer to deflate the tyres whenever I’m removing any wheels – rather than release the brake cables & have to fiddle around adjusting the brakes once the wheels are back on. In my limited Brompton experience, the longest I’ve had any tyres mounted has been the 18 months that Robinson has been running Schwalbe Marathon Plus models. No punctures but rather a lot of tyre deflations/inflations in that time? (I confess; tinkering, cleaning, what-have-you – & some recent airline travel that we felt obliged to follow the airlines advice & deflate the tyres!?)

During & following our recent UK trip, Robinson suffered 2 unexpected flat tyres; 1 to the front & the other to the rear. Each time I found that the tubes had “abraded” or chafed on the inner surface at a spoke head point. The Zefal cloth rim tapes were prefect & no sharpness was detected at the spoke head. Another tube went in & we continued merrily along (with a growing suspicion about those spoke heads). What I had noticed was regular spoke head impressions all around the inside of the tubes. Hard to see in pics; eyesight or feel are conclusive!

20131009-235659.jpg

I assume the spoke heads make quite a firm contact with the tube & that deflations/inflations/”air top-ups” cause a lot flexing & chafing at the pressure points? What can be done? Well, this could be my chance to justify new Brompton double-wall rims? (or maybe not just yet!) “Do nothing” is one option where I could ignore it & await another unexpected deflation? Regular inspections aren’t really the answer, although very close tube examination may highlight any advanced chafing? (being hopeful aren’t I?)

One thought I had was that the cloth rim tape too easily follows the exact shape of the spoke head & that plastic rim tape loops may be kinder/smoother? For Ralph’s front wheel I fitted some Brompton plastic rim tape but the difficulty of correctly locating the tape within the well resulted in an overnight loss of confidence & I switched to using some thin 16mm wide BBB cloth tape & then refitted the plastic tape over the top. My thinking with the 16mm tape (wider & thinner than the usual 13mm tape I use on the Brompton rims) was to cover the well a little further than usual & leave the plastic tape to fall into the well entirely (rather than the plastic tape alone, trying to “walk”up the side of the well when being fitted).

Next I turned to Robinson’s front wheel & I tried leaving the Zefal cloth tape in place but also fitting a plastic rim tape loop over the top. Unfortunately, the difficulty in refitting the Marathon Plus tyre showed that the total thickness of tapes was leaving insufficient room in the well. I then tried another layer of Zefal tape over the top of the original, & managed to refit the tyre. At this point I feel I’ve got the ideal basis for a long-term test – & decided to leave Robinson’s alone (or maybe I just got fed up at the time & then later decided to make it a three-way comparison test?).

Current state-of-play (early October, 2013) –
Ralph’s front rim with BBB + plastic tapes
Ralph’s rear rim (double-wall Sun brand) with BBB tape
Robinson’s front rim with 2 layers of Zefal tape
Robinson’s rear rim with 1 layer of Zefal tape.

Which will win out? Will there be any difference? Will a genuine puncture mess up my test? My guess is that something else will change – & my test will be redundant?

Toolkit testing

I think the Brompton Toolkit is a lovely piece of equipment. Nicely engineered & well thought-out – but with flaws included? The tyre levers have certainly come under criticism owing to breakages & I await the production of redesigned levers. (Having purchased 2 toolkits in the UK recently, I’m no longer awaiting the re-release of the toolkit; just the levers.) My toolkit purchase was made with the knowledge of the flawed levers & their expected replacement, but I thought that the levers may be sufficient “as is”? (& the rest of the toolkit was irresistible?)

The lever design is interesting; fitting together to minimize space within the storage housing & meant to be kept together when commencing a tyre removal. Once the tyre bead is levered over the rim, one lever can be clipped to a spoke & the other lever is then slid around the rim, progressively pulling the rest of the bead over the rim. However, stage 1 of the flaw is that users will read the instructions & follow them. The next stage is that the levers are not strong enough to survive usage that fails stage 1. Personally, I believe that there is a further stage in that the Brompton tyre levers weren’t designed to operate on anything other than stock Brompton rims (more later).

As for other flaws, perhaps it’s nit-picking to say that the ratchet & removable bit usage is going to be compromised depending on the positioning of the item being adjusted/removed/whatever? Time will tell, hopefully not at the wrong time & place?

The spanners that are cleverly combined within the tyre levers have been ok for my minimal use & the wheel spanner (when still fitted in the case) is very comfy – as compared to gripping it when removed?

On-bike storage within the front section of mainframe is neat & effective (far easier than my previous on-board tool set: wheel spanner, tyre levers & Allen key-set tied with a rubber band, wrapped in disposable gloves & maneuvered into the mainframe front section). I haven’t “lost” the disposable gloves; they’re now included with a spare tube, wrapped In a piece of fiberglass mesh & stored in the mainframe rear section. (The mesh makes it easier to insert the items in the frame & gives me something to grip when extracting everything.)

Testing:
As an on-bike emergency toolkit, it’s seems ideal – but to date my toolkit testing has all been done in my garage & mostly of an elementary effort, although the tyre levers have been used a number of times.

Unfortunately I have to divulge the test score as:
tyre levers 3, Brompton single wall rims 0
tyre levers 0, Sun rim 1
That’s correct, the rear wheel on Ralph, my Alfine 11speed Brompton, has defeated one of the levers & snapped off a piece. Owing to the rim having a rather flat profile, there’s very little well for the tyre bead to sit in when removing the tyre & hence getting the bead over the rim is “difficult”. From what I remember, the pair of levers were good enough to get the bead over the rim initially, but when I tried to slide one lever sideways (very difficult), the thinner lever couldn’t stand the pressure between the rim & tyre (a Marathon Plus) & the end snapped off! (Ralph &/or I shall be carrying a separate set of tyre levers until further notice!)

20131005-221006.jpg